Description
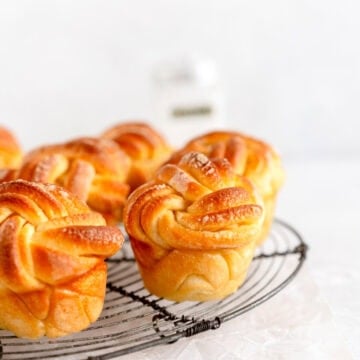
Soft and fluffy lemon buns are made with an easy enriched dough and filled with a lemon sugar mixture. The braiding is simple - you just cut them into strips and shape into beautiful buns! These are amazing served as is or you can finish them with powdered sugar or a lemon glaze.
Ingredients
Scale
Lemon Sugar
- 250g granulated sugar
- 10g freshly grated lemon zest
Lemon Bun Dough
- 250g whole milk, lukewarm
- 2 large eggs (about 100g not including the shell), at room temperature
- 1 tsp vanilla bean paste or vanilla extract
- 565g All-purpose flour
- 50g of the lemon sugar
- 7g instant dry yeast
- 3g salt (I used kosher)
- 125g unsalted butter, at room temperature
Filling
- 30g unsalted butter, melted
- Remainder of the lemon sugar
Instructions
LEMON SUGAR
- Place the sugar into a medium sized bowl. Add the freshly grated lemon zest, and using your fingers, rub the zest into the sugar until well incorporated. This helps to release the oils and flavours of the lemon. Place into an airtight container until you are ready to use.
LEMON BUN DOUGH
- Place all the dough ingredients except for the butter into the bowl of a mixer fitted with the dough hook attachment. I like to add them in the order that they are listed in the recipe - adding the liquid at the bottom of the bowl means you are less likely to get flour lumps stuck.
- Mix on low for 2-3 minutes, until the dough has come together. Increase the mixer speed and mix on medium speed for a further 5 minutes until the dough is smooth and elastic.
- Add the butter a little at a time, waiting until it is incorporated before adding the next piece. Once it has all been incorporated, mix the dough for a further 3-4 minutes until it is smooth and soft.
- Turn the dough out onto a counter and shape into a ball (I do not need to use flour here). Place into a greased mixing bowl and cover the bowl with plastic wrap. Leave on the counter for 10 minutes to kick start the rising process, then transfer to the fridge for at least 4 hours or up to overnight.
FILLING AND ASSEMBLY
- Grease two non-stick muffin pans - this recipe makes 16 buns so I like to do 8 in each pan. Grease 8 wells of the pan with baking spray or butter. I like to leave a gap between rolls where I can - with 8 rolls per pan, there will be some next to each other.
- For rolling the dough out I do this in one go, but if you are worried, you can divide it into two (see notes). For this recipe I have written how to do it all in one go. Turn the chilled dough out onto a lightly floured surface. Shape into a rectangle by patting it down or pressing down with your rolling pin and squaring off the edges with a bench scraper.
- Roll the dough out into a rectangle that is 36x64cm (14x25 inches). If you find the dough is snapping back on you, give it a few minutes to rest and then keep rolling. Square off the edges as you go.
- Using a pastry brush, brush the dough with the melted butter, taking it right to the edges. Evenly sprinkle with the lemon sugar and press it down lightly.
- Holding the long end of the dough, fold the dough into thirds like a business letter. To do this, take one edge and fold it 2/3 of the way down the dough, then fold the bottom edge up over to form one long folded strip of dough. Pat out gently to make sure that there are no bubbles.
- Cut the dough into two 32cm pieces. Cut each piece of dough into 8 strips, each 4cm (1.5") wide, so you will have 8 strips of dough, 4cm across and about 12cm long.
- Transfer the dough strips to a parchment paper lined sheet pan (it is ok if you arrange them so they are touching). Repeat the cutting process with the other piece of dough so you have 16 strips of dough in total.
- Cover the pan lightly with plastic wrap and place into the fridge for 15 minutes to firm up slightly - this makes shaping much easier.
- Remove the dough from the fridge. Working with one piece at at time, cut the strip of dough into 2 pieces, leaving an end intact. Braid the strips of dough together to form a braid. Starting with the intact end, roll the whole braid up into a ball. Place into a cavity of the muffin pan.
- Repeat this process with all the remaining pieces of dough. Do not worry if some of them are messy or a little wonky. Rising will help this. Do 8 dough balls per pan.
- Lightly cover the pans with plastic wrap and place in a warm place until the buns are puffy and when pressed lightly with a finger, leave an indentation that slowly springs back, anywhere between 45 minutes to an hour and a half depending on your environment.
- Toward the end of the proofing process, preheat your oven to 180°c / 350°f. Remove the plastic wrap from the risen buns.
- Bake the buns for 15-2o minutes, until they are golden brown. Remove the buns from the oven and transfer from the pans to a wire rack soon after taking out of the oven so that they do not stick. Leave to cool on the wire pan.
- Store leftovers in an airtight container at room temperature - you can refresh them in the microwave the next day.
Notes
I left my lemon buns plain - if you would like to, you can finish them with a lemon glaze or a dusting of powdered sugar.
I rolled out the dough all in one big piece for these lemon buns. If you would prefer, you can divide it in two - follow the rolling and assembly instructions for my cinnamon twists but use the lemon bun filling.