


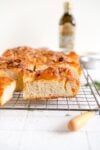

Homemade Focaccia is super easy. This no knead focaccia comes together quickly and and requires no special equipment. Homemade Focaccia Bread has a crisp outside and a soft inside. This easy Focaccia recipe super versatile, you can finish it however you like, or change up the schedule to suit - either a same day focaccia recipe, or an easy overnight focaccia.
Hi! Just popping in to share this recipe with you today for this easy focaccia bread recipe! I spent the last few weeks testing this focaccia bread recipe and all the different variations for you and I am so excited to share!
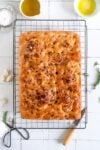
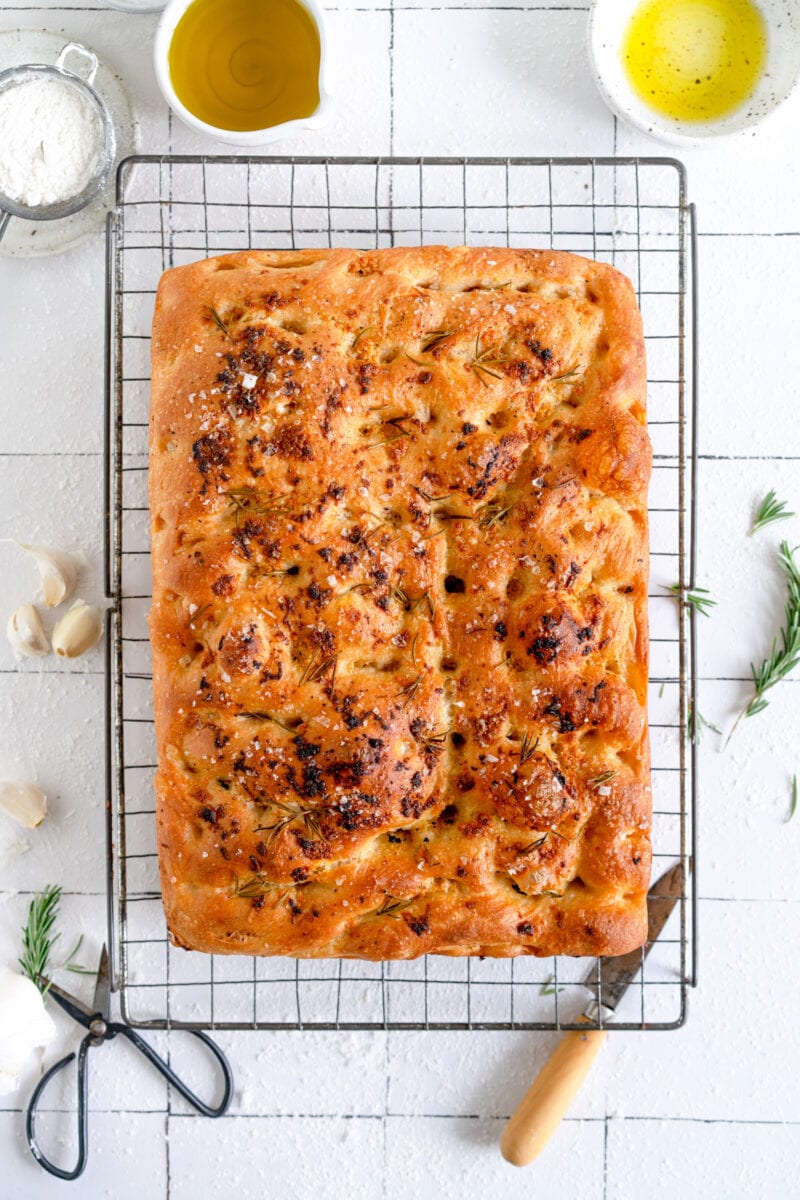
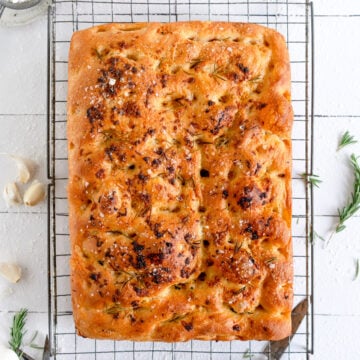
The focaccia dough comes together super quickly. It can be kept in the fridge for a long period of time to work with your schedule. I topped it with a simple garlic and rosemary topping, but you can finish this any way that you like. This is a great base no knead focaccia dough recipe and I can't wait to play around with it more to come up with more flavour and topping combinations. This easy focaccia is great for any occasion, but also makes a great sandwich bread or as an accompaniment to soups.
Sample Schedules for making no knead Focaccia Bread
I tested a bunch of different ways of making this focaccia dough, with cold and room temperature rises. The options you have after making the dough are:
- Refrigerator first rise and room temperature second rise - This is my preferred method for making focaccia and the one that I have written in the recipe. Make the dough and then place it in the fridge for at least 12 hours, and up to two days. Then, transfer to the pan and do the second rise at room temperature. This will take anywhere from about 2 hours to up to 3 ½ to 4 hours. You need to watch the dough carefully. 3 hours seemed to be the sweet spot for me when testing.
- Room temperature first rise and refrigerator second rise - This is a great option if you need the focaccia earlier the next day and don't have time to wait for it to take 3 hours to rise. Do the first rise at room temperature (about an hour and a half). Then, transfer the dough to the pan, cover with plastic wrap, and place into the fridge overnight. The next day, pull the dough out from the fridge and leave to stand on the counter while the oven preheats, just to warm the dough slightly before dimpling, topping, and baking.
- Room temperature first rise and room temperature second rise - The first rise will take about an hour to an hour and a half. Then transfer the dough to the pan and do a second rise, which should take anywhere between 40 minutes to an hour. Preheat the oven soon after putting the dough into the pan to ensure that it is ready when you are ready to bake.

Baker's Percentage and Calculating Hydration in Recipes
This is a fairly high hydration dough - it is 89% hydration. Bread baking will sometimes use Baker's Percentages to determine things like hydration. Baker's Percentages are the weight of each ingredient, relative to the weight of flour. To calculate the percentage, you divide the weight of the ingredient by the weight of the flour.
Therefore, the hydration (amount of water) in a recipe is calculated by dividing the weight of the water (535g) by the weight of the flour (600g). So, the hydration of this bread is 89%.
Can I use sourdough starter in my focaccia?
Yes - if you wanted to use some sourdough discard in your focaccia bread (rather than using the sourdough to leaven the focaccia, it just provides flavour and is a great way to use up discard). To do this you replace some of the flour and water in the dough recipe with some sourdough starter.
For example, we want to add in 150g sourdough discard - we would leave out 75g of water and 75g flour, provided that your starter is at 100% hydration (equal parts flour and water).
The new quantites are for making sourdough discard focaccia:
- 300g bread flour
- 225g All-purpose flour
- 460g water
- 150g sourdough discard at 100% hydration.
All the other quantites are the same. Add the sourdough discard along with the water and olive oil.
❤️ Made this recipe and love it? ❤️
I would LOVE for you to leave me a review and star rating below to let me know how you liked it! Also, please make sure to tag me on Instagram!
Answers to your baking questions
Over the years, many of you have asked me questions about:
- baking in grams
- adjusting oven temperatures
- what kind of salt to use
- and many more!
I've curated and answered them all for your easy reference in this frequently asked questions post!
Easy Focaccia Bread (No Knead)
- Prep Time: 12 hours
- Cook Time: 30 minutes
- Total Time: 12 hours 30 minutes
- Yield: One 9"x13" pan of focaccia 1x
- Category: Bread
- Method: Baking
- Cuisine: Italian
Description
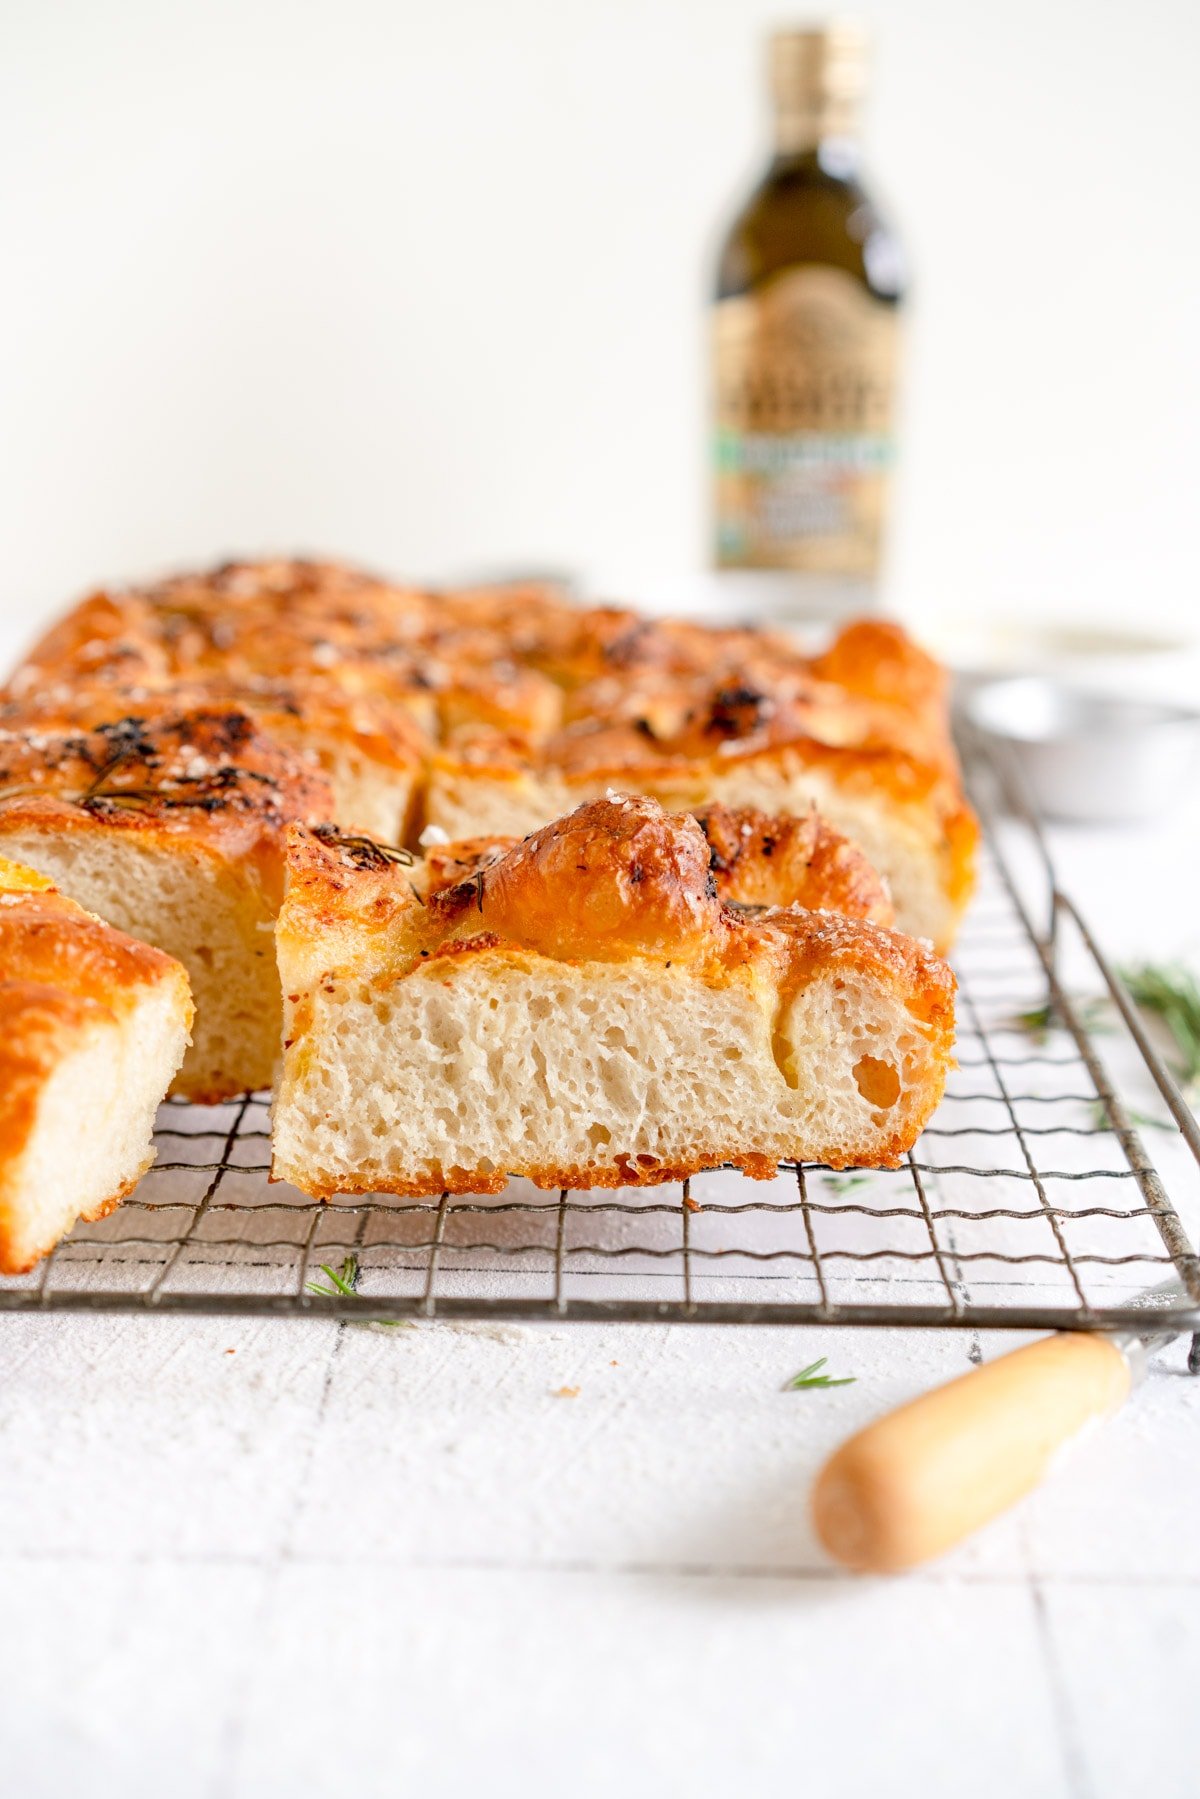
This simple focaccia bread recipe is super easy. It comes together quickly and and requires no special equipment. This Focaccia Bread has a crisp outside and a soft inside, and is super versatile - you can finish it however you like!
Ingredients
Focaccia Dough
- 300g Bread Flour
- 300g All-Purpose Flour
- 14g salt
- 2 tsp instant yeast
- 1 tsp sugar
- 20g extra virgin olive oil
- 535g lukewarm water
- Extra Oil for greasing the dough and pan
Garlic and Rosemary Topping
- 50g extra virgin olive oil
- 4 cloves garlic, finely minced or grated on a microplane
- Leaves from 1 sprig rosemary, or to taste
- Flaky sea salt for sprinkling, optional
- A few turns of black pepper for finishing, optional
Instructions
FOCACCIA DOUGH
- In a large bowl, combine the bread flour, all-purpose flour, Kosher salt, yeast, and sugar. Add the extra virgin olive oil and water, and mix with a spatula until a shaggy dough forms and there are no dry parts. The dough is wet and sticky. This is normal. The water quantity is correct. Don't freak out, you will be fine.This is normal. Super wet dough = super fluffy focaccia. The pan is there to provide structure when it bakes, so it's ok that it's wet and sticky! It might look a bit different to mine but if you have weighed your ingredients, all will be ok, promise.
- Cover the bowl with a tea towel and leave to stand for 5 minutes.
- Perform a set of stretch and folds on the dough. To do this, wet your hands, then take a section of the dough and stretch it up and fold it onto itself. Rotate the bowl 90° and repeat the process. Repeat this two more times until you have gone around the bowl, then do one more set of four stretch and folds around the bowl (a total of 8 stretch and folds). Cover the bowl with the tea towel and leave to sit for 2 minutes.
- Repeat the stretch and folding and resting process two more times, for a total of three rounds of stretch and folds, each two minutes apart.
- Drizzle the surface of the dough with a little olive oil, and turn the dough over in the bowl to coat. Cover the bowl with plastic wrap or a lid (to make sure it doesn't dry out), then place in the fridge overnight, a minimum of 12 hours but up to 2 days. (see sample schedule in body of the post for instructions on alternative rising).
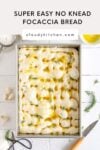
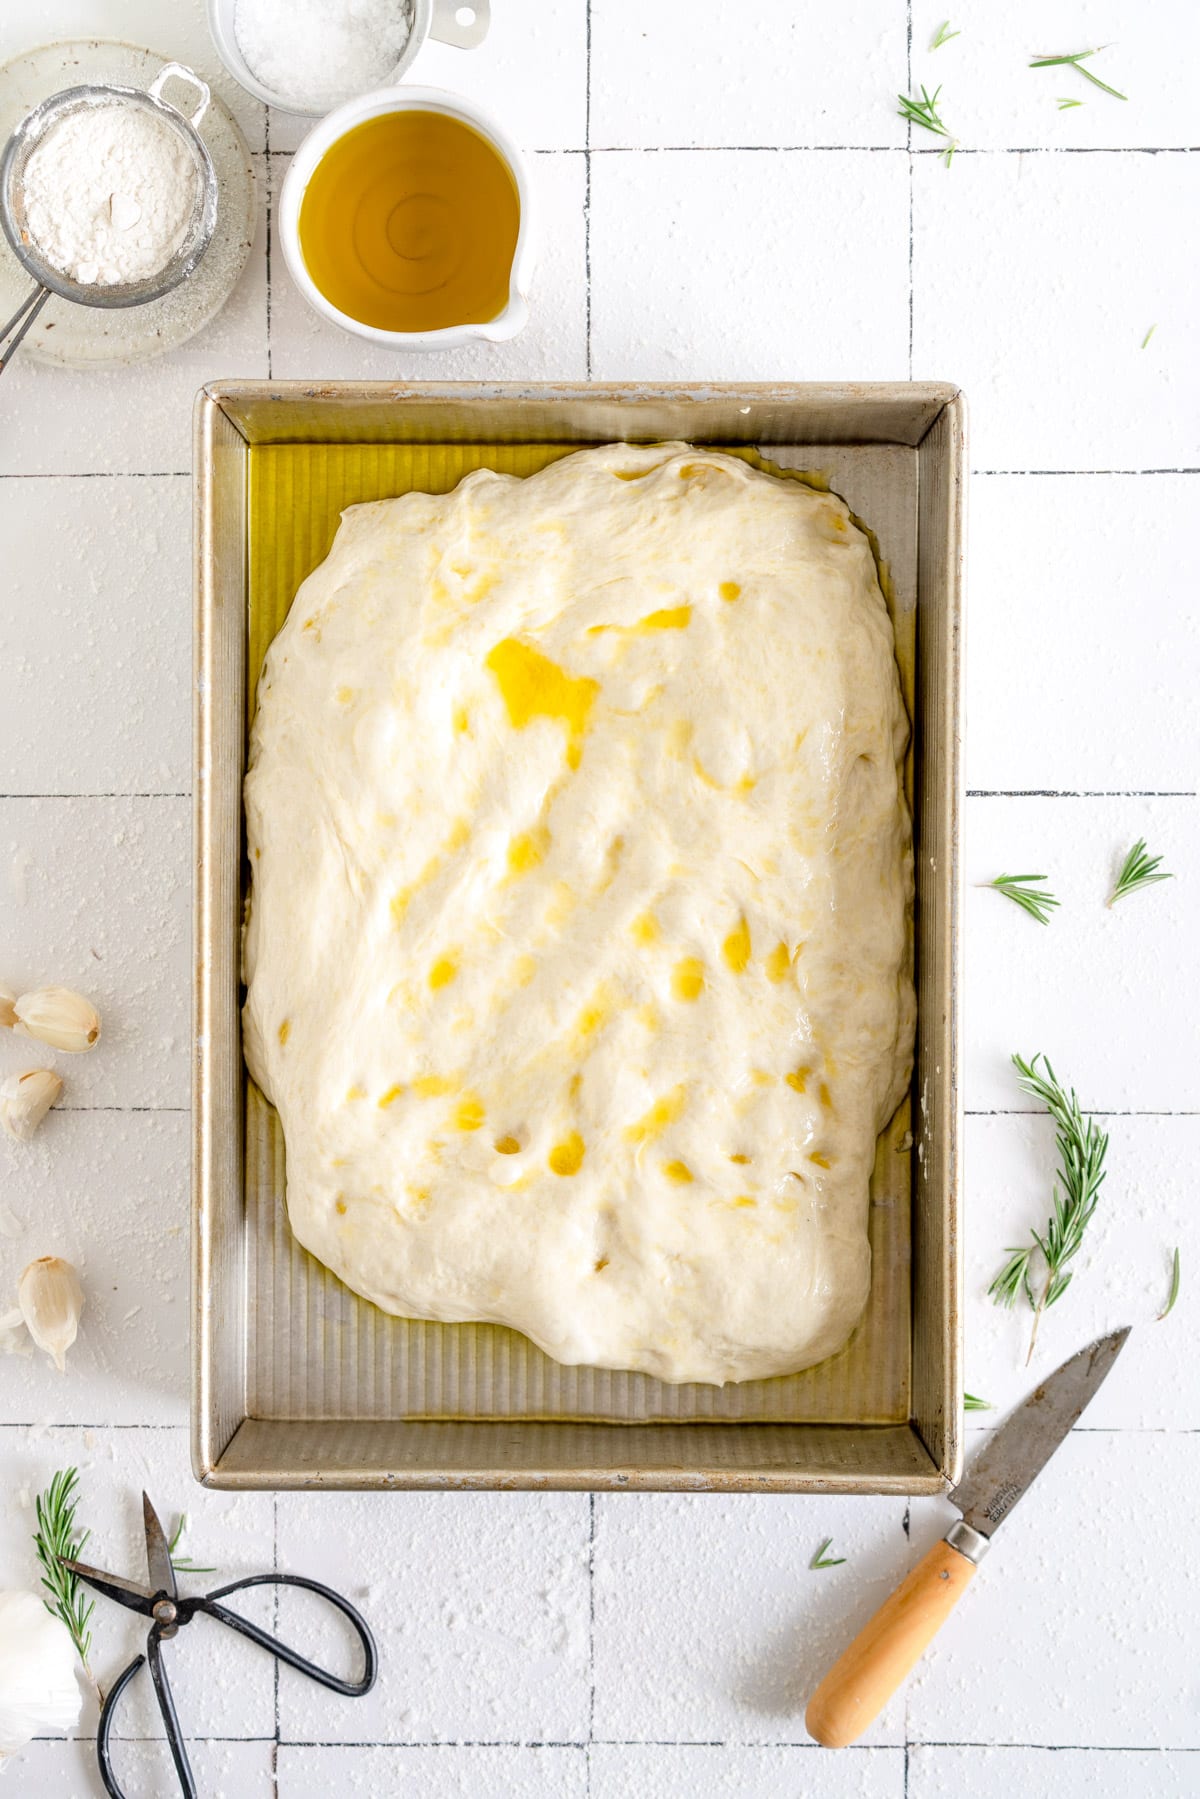
- Generously drizzle a 9"x13" (23cmx33cm) non stick baking pan with olive oil. (see notes on using a pan that isn't nonstick). Turn the risen dough out into the pan and turn it to fully coat it in the oil. Shape into a rough rectangle shape by pressing it down with your oiled fingers and tucking edges and corners in if needed. Leave to sit for 5 minutes to relax.
- Gently spread the dough toward the edges of the pan using your oiled fingers. It does not have to reach all the way - just encourage it to spread out slightly more.
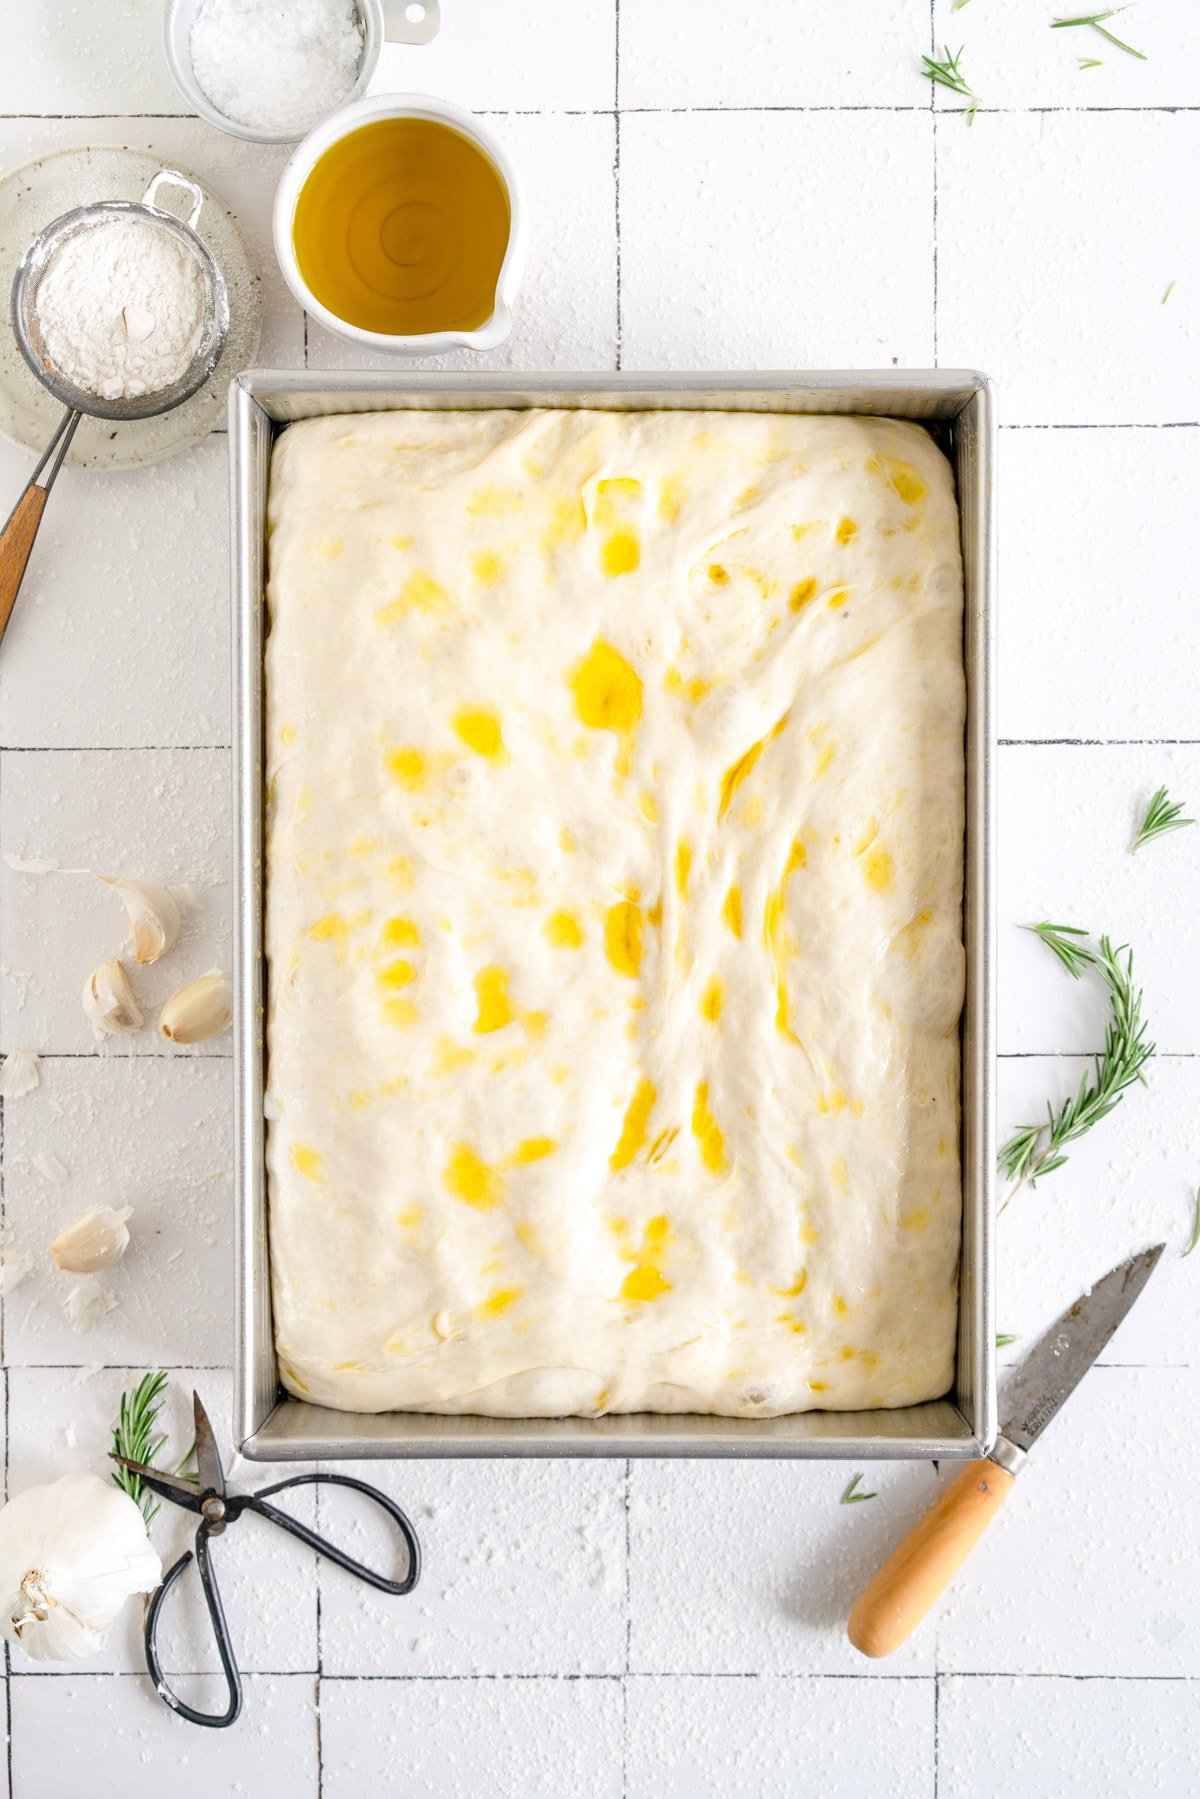
- Drizzle the surface of the dough with a little more olive oil so that it does not dry out.
- Leave the pan in a warm spot, uncovered, to rise, until doubled in size, puffy, and jiggly, anywhere from 2 to 4 hours depending on your environment. When it is ready to bake, it will leave a small indentation that slowly springs back when gently pressed with a finger. Toward the end of the rising process, preheat the oven to 450°f / 230°c (conventional, not fan), and arrange a rack in the middle of the oven.
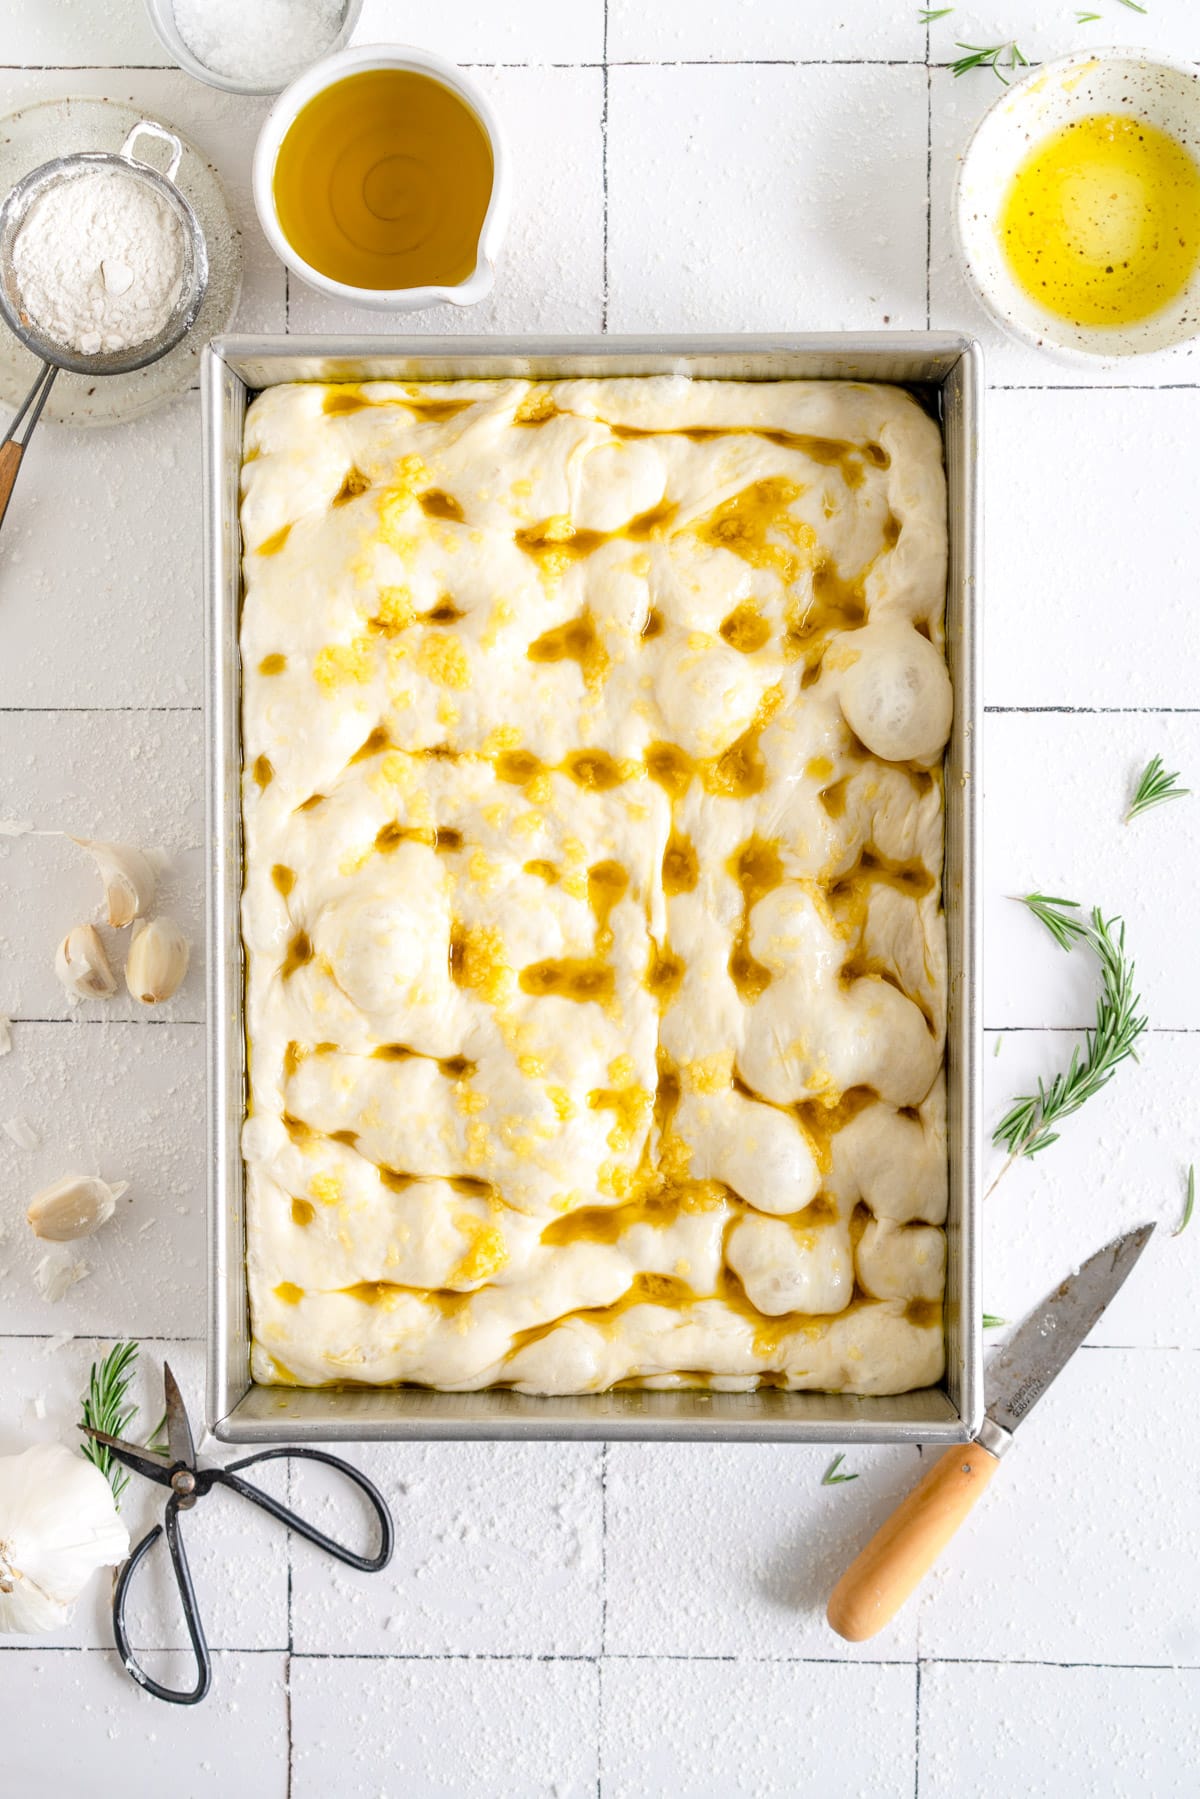
- Combine the 50g extra virgin olive oil and minced garlic in a small bowl, and mix to combine. Spoon over the surface of the dough.
- Oil your fingers and use them to dimple the dough all over, pressing your fingers almost to the bottom of the pan. Bubbles will form in the dough - do not pop them, just leave them be.
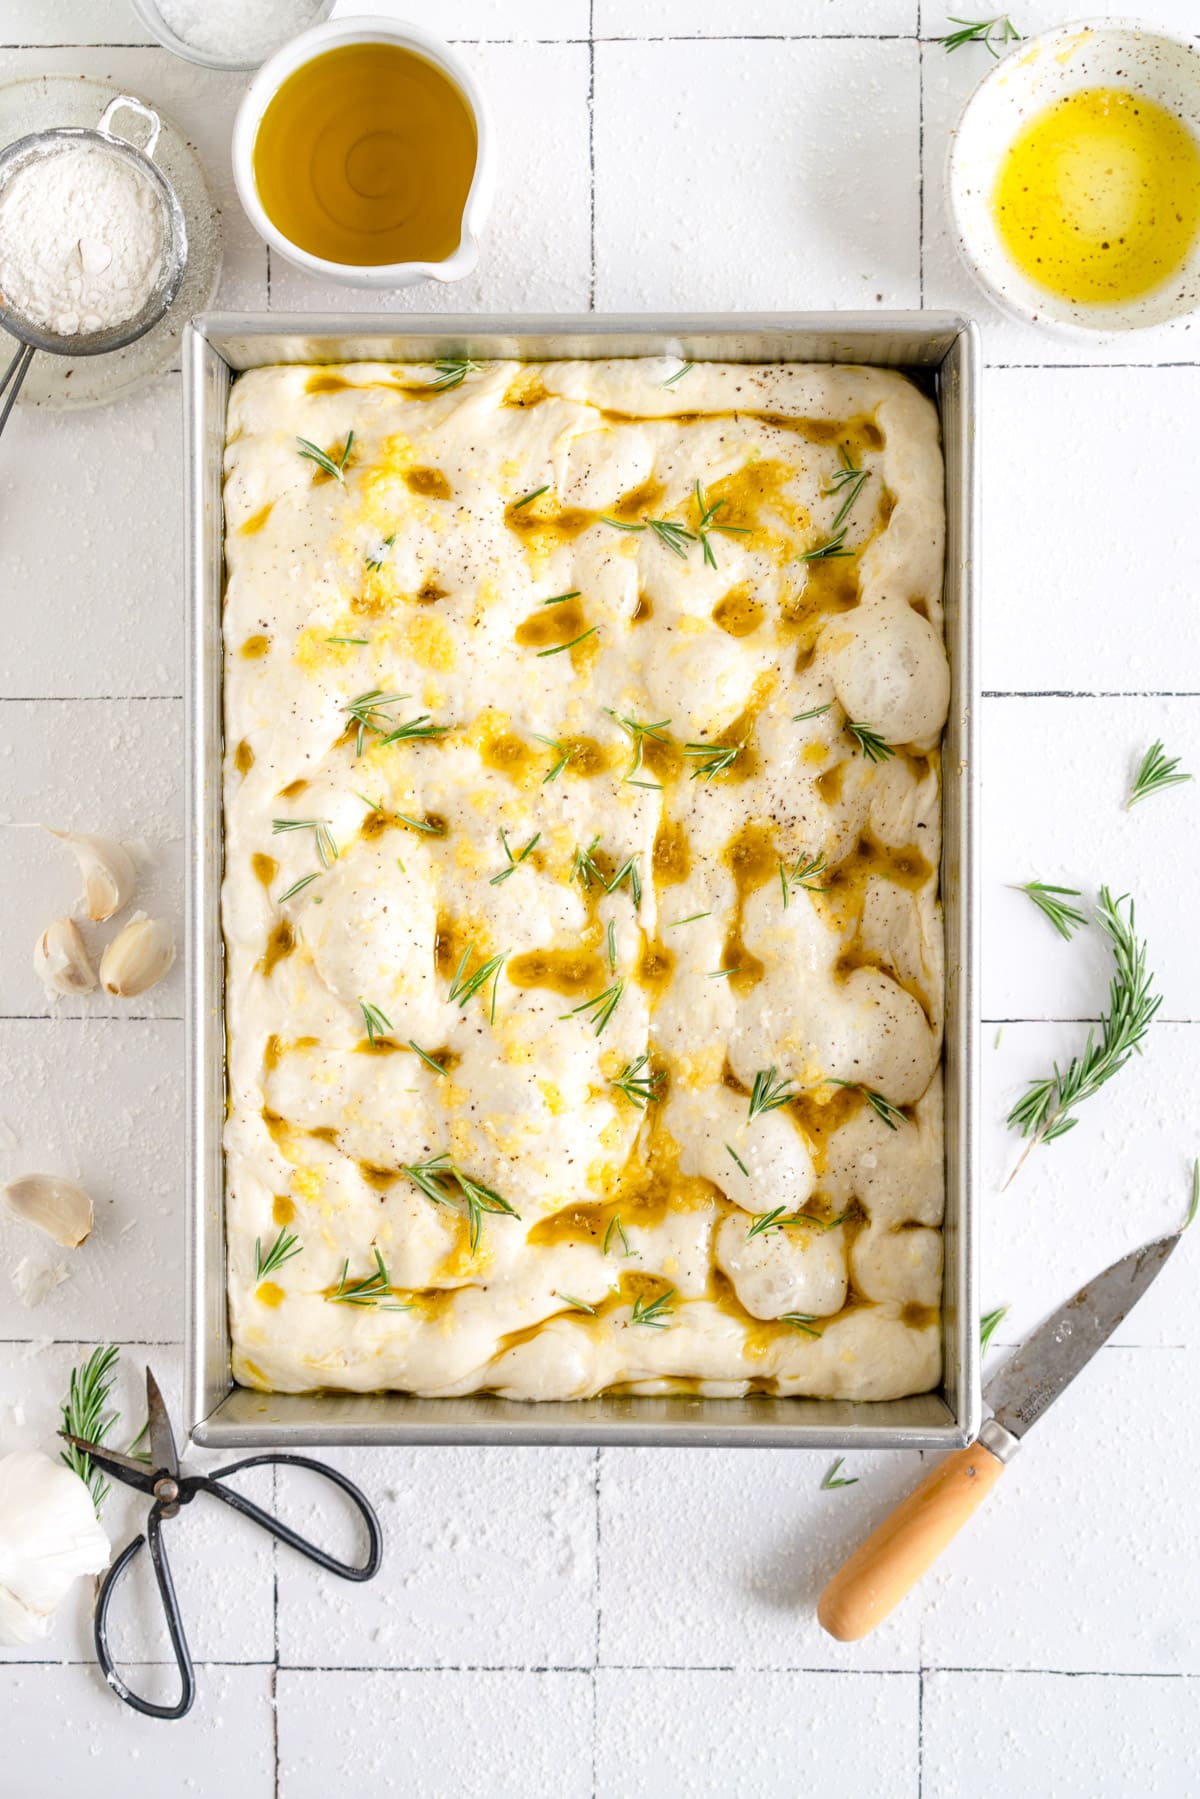
- Sprinkle with the rosemary, flaky sea salt, and pepper.
- Immediately transfer to the oven and bake for 25 to 30 minutes, or until golden brown on the surface and pulling away from the sides of the pan.
- Remove from the oven and allow to stand for 5 minutes then transfer to a wire rack to prevent the bottom from getting soggy.
- Leave to cool then slice into pieces using a bread knife. Store leftovers lightly wrapped at room temperature.
Notes
The water quantity is correct. Don't freak out, you will be fine.The dough is wet and sticky. This is normal. The water quantity is correct. Don't freak out, you will be fine. It might look a bit different to the video too - don't worry! Focaccia is meant to be sticky, the pan does all the work holding it in, you'll be just fine!
Please see "Sample Schedule" in the body of the blog post for variations on rising time and temperature.
This is the pan that I use for making focaccia - it is so great and nothing sticks! Using a nonstick pan is very important or your focaccia may stick. You can line it with a layer of parchment if you are worried, or add some butter first and then olive oil for insurance but your best bet is to use something nonstick and metal.
To make the focaccia a little thinner to get a thin and crispy situation, scale the recipe by about ⅔ and bake in a quarter sheet pan, or leave the recipe whole, and bake in a half sheet pan for a larger scale, thinner focaccia.
I recently tried making my focaccia recipe in Texas muffin pans and it worked out great - a full recipe of focaccia makes 9 Focaccia 'muffins'. To make in muffin pans, divide the risen dough into 9 portions (about 125g each), and place into the oiled muffin tin cavities. Rise as directed (it may take a little less time), then dimple and bake for about 20 minutes at the temperature directed in the recipe. Check after 20 minutes and bake until you have reached your desired level of doneness. I tried making them in regular sized muffin pans but didn't like it as much as I felt that they dried out.
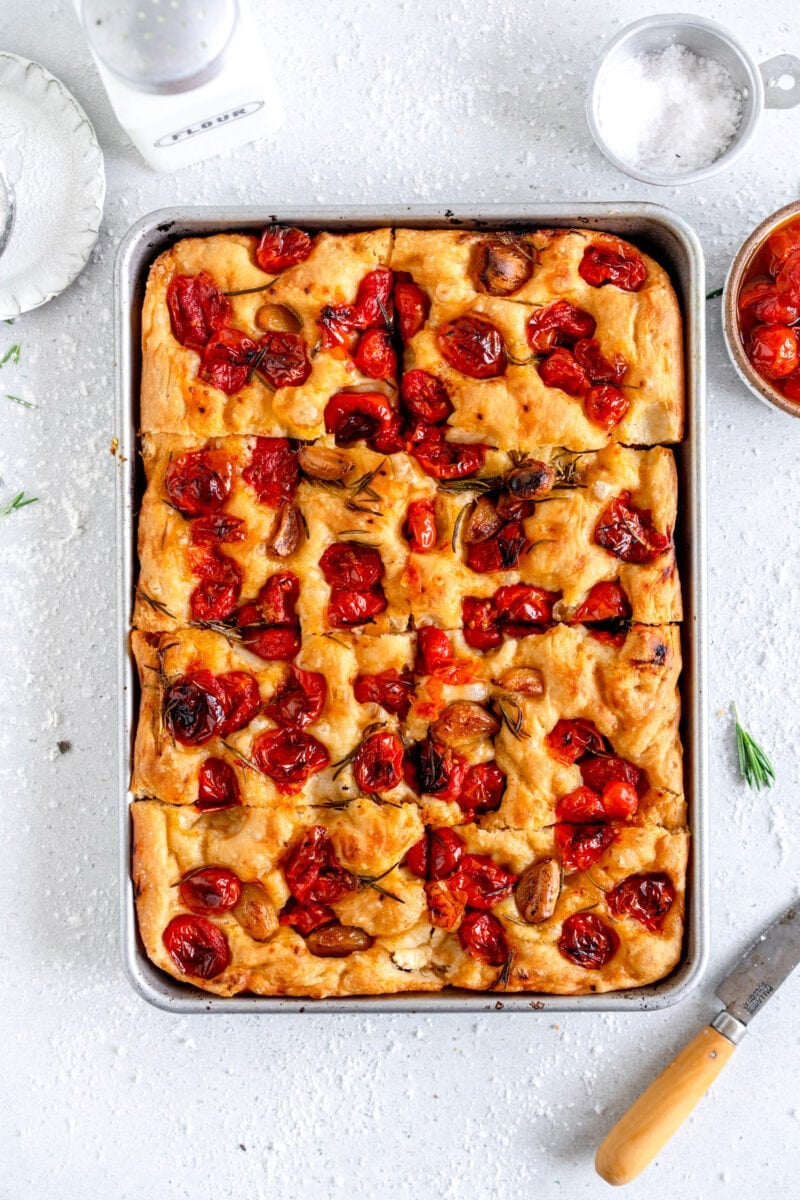
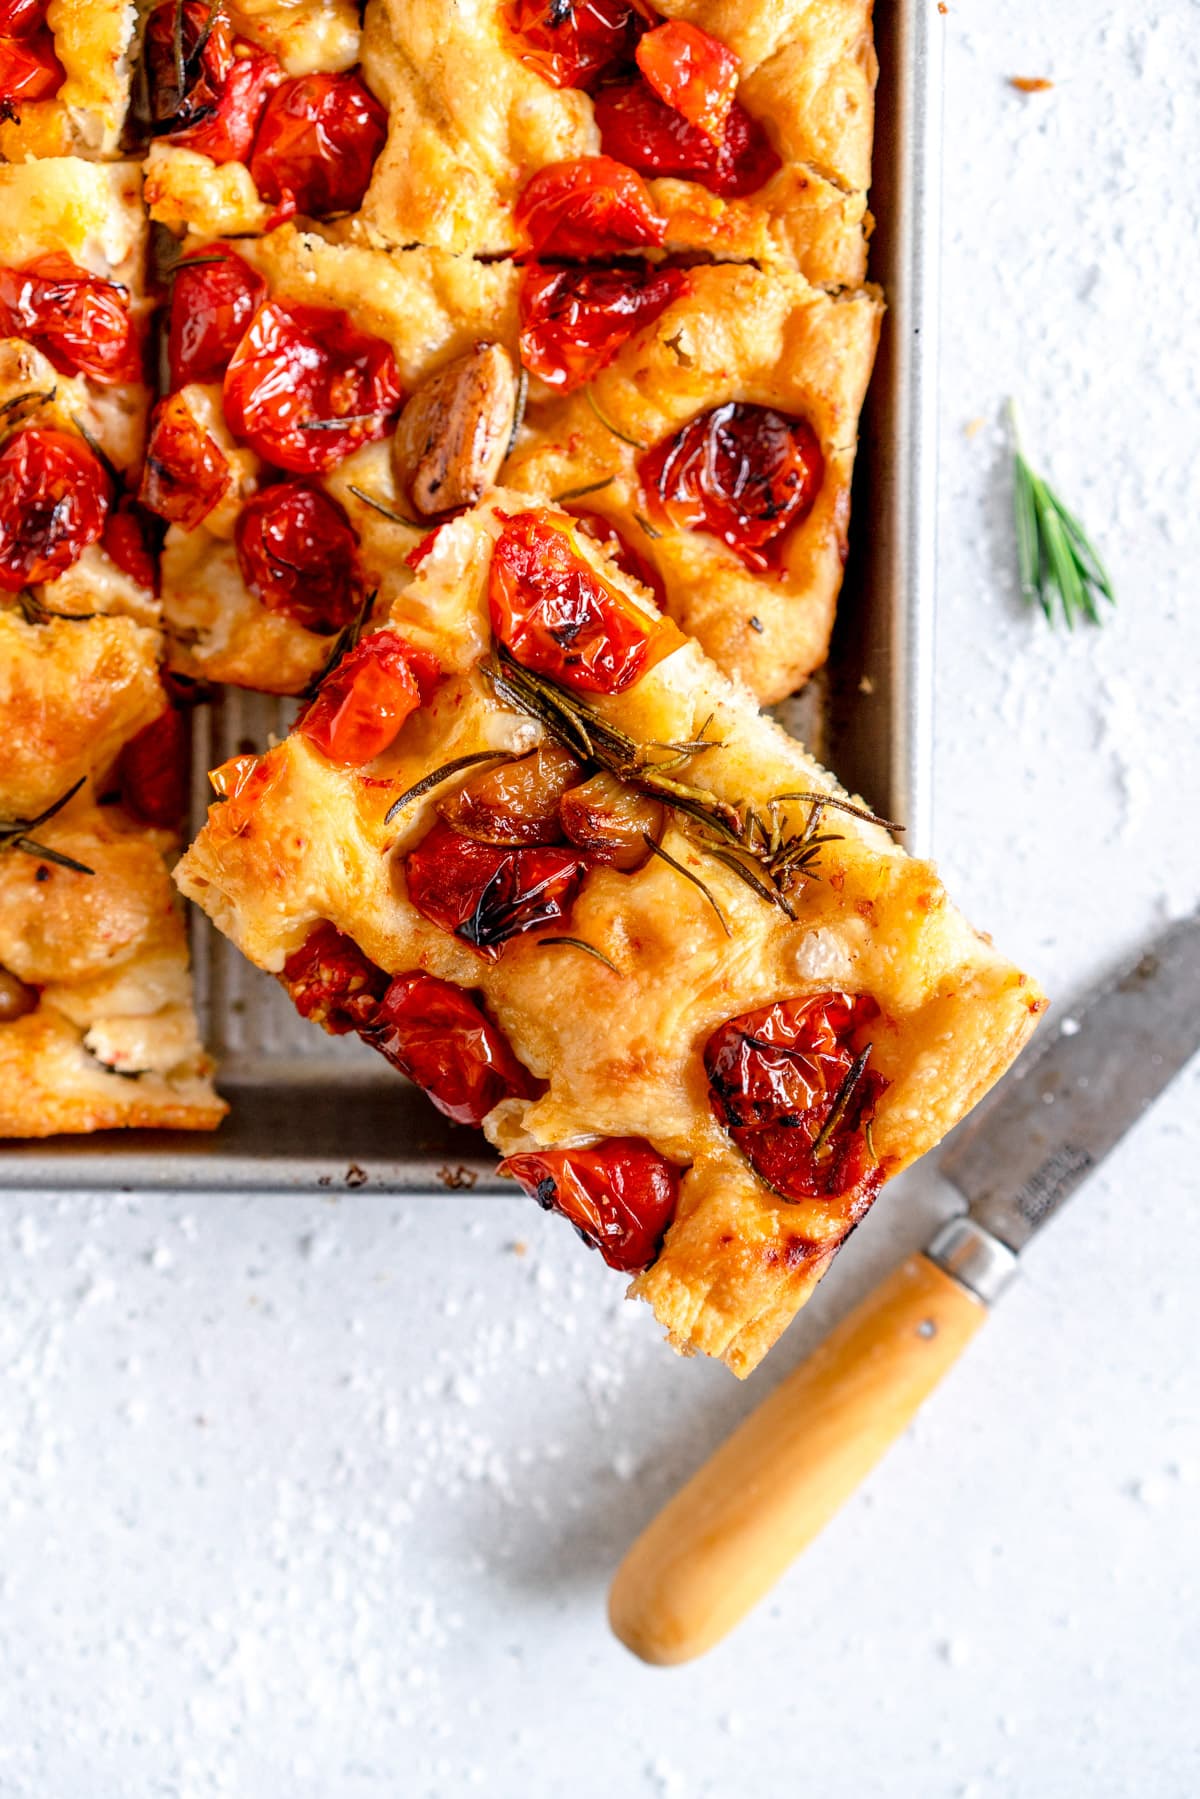
To make tomato focaccia: Roast 800g cherry or grape tomatoes, 10-12 garlic cloves, a sprig of rosemary in olive oil on a sheet pan at 325°f / 160°c for an hour, shaking the pan occasionally. The tomatoes will cook down and the garlic cloves will soften. Allow to cool, then place onto the top of the dough before dimpling, along with some of the oil. Bake as per the recipe.
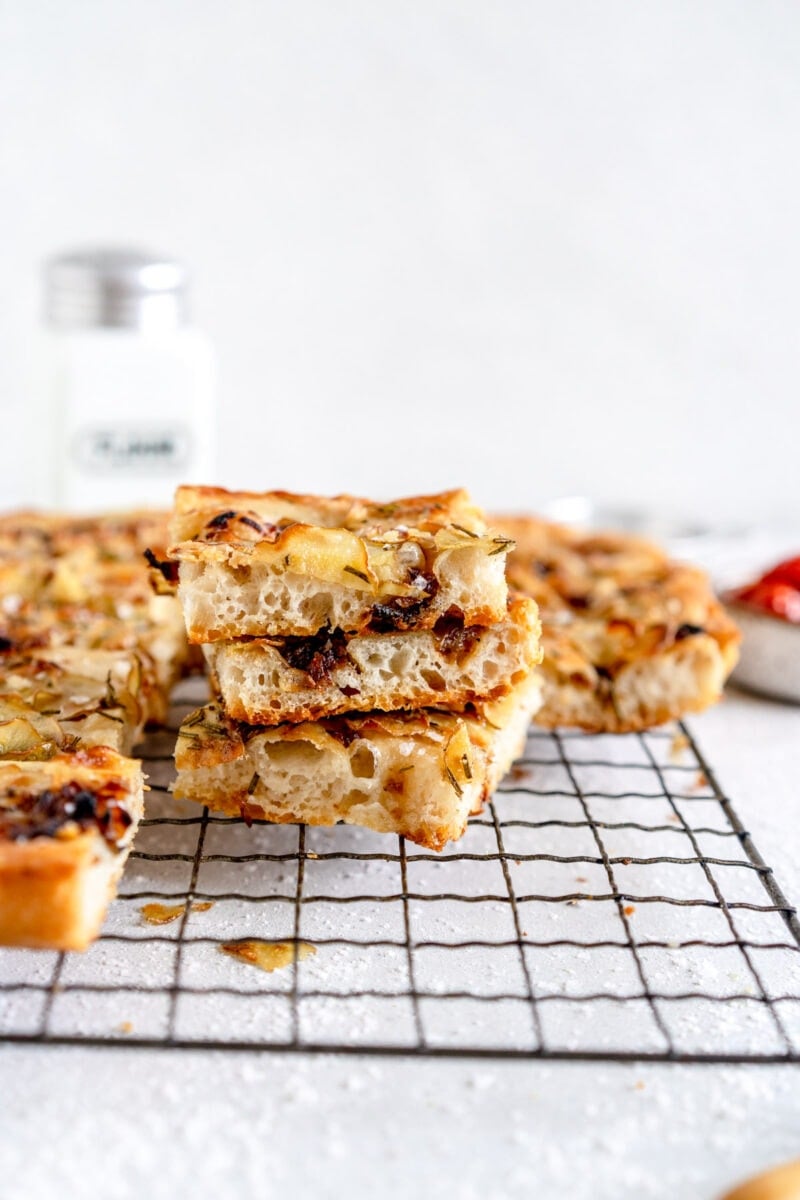
To make Onion and Potato Focaccia: Caramelise about 700g thinly sliced onion on medium to low heat, stirring often, until brown and jammy. Alternatively use a caramelised onion jam or relish. Spread the risen and dimpled dough with the caramelised onion, then top with about 120g thinly sliced potato which has been tossed with a little olive oil, chopped rosemary, salt and pepper. Bake as directed - the potato will get slightly crispy on top.
To make olive focaccia: Top the dough with chopped olives of your choice (add as many as you want, measure with your heart), then dimple as directed. You can add chunks of feta in here too.
To make everything bagel focaccia: Make the dough as directed, but after the autolyse phase (where you leave it to stand for 5 minutes), mix in 160g finely chopped white or brown onion, and 3 Tbsp everything but the bagel seasoning. Mix in well then continue with the stretch and folds. You can also use scallions (spring onions) in the place of onion. Before baking, either before or after dimpling, sprinkle 1 Tbsp everything seasoning over the bread.
To make Parsley oil (or other herb oil) focaccia: Make a parsley oil - rough recipe (please excuse the cups!) is the leaves of a large ish bunch of parsley (if you grab the stems of the bunch it should be about a fist full), blended well with about 1 cup of olive oil 1-2 cloves of garlic, the zest of 1 lemon, and about 2-3 Tbsp lemon juice. Blend in a high speed blender or using an immersion blender, then adjust to taste with salt, pepper, and more lemon juice or oil. Use the parsley oil to coat the bottom of the pan when you add the dough in, then add more on top before dimpling. Store the parsley oil in an airtight container in the fridge - we have it on top of soup or bread or part of a salad dressing and it is so good!
To make Cheeseburger Focaccia: I make a cheeseburger pizza all the time and we had leftover ingredients from making burgers the other night so I cheeseburgered my focaccia. Brown off about 250g ground beef / beef mince, browning well. Sprinkle with salt and set aside on a paper towel to cool. For a vegetarian option, you can brown off finely chopped mushrooms - you may need more as they shrink down. To make cheeseburger focaccia, top the risen dough with either caramelised onions (notes in the caramelised onion topping above), or an onion relish or jam, which is what I use if I haven't made onions. Follow with about 150g shredded low moisture mozzarella cheese, then the browned meat, then another 50g mozzarella cheese (I just grated 200g cheese and divided it up, no need to measure the portions). Dimple and bake as directed. When baked, finish with pickles and burger sauce of your choice.
To make butternut, goat's cheese, brown butter and sage focaccia: Make the focaccia as usual up to the second rise, then before putting in the oven top with 300g (approximate, add more if you like) roasted butternut or pumpkin cubes, and about 150g crumbled chevre goat's cheese (feta would be good too). Add salt and pepper and bake as directed. While the focaccia is in the oven, melt about 150g butter (I use salted) in a small frying pan. When the butter is melted, add a big handful of fresh sage leaves and continue to cook, stirring often, until the butter has browned and the sage leaves are crispy. Transfer to a bowl to stop the cooking process. Once the focaccia has come out of the oven, leave it to stand for 5-10 minutes before topping with the brown butter mixture. If you are making it ahead, leave off the brown butter and sage mixture until just before serving so that it doesn't go soggy. You may be best to remove the bread from the pan before adding the brown butter sage so that it doesn't cause sticking.
To make Focaccia Rolls: Make the dough with all bread flour and use 500g water - this makes the dough a little less wet and much easier to shape. I have done it as written in the recipe with all bread flour and it works fine too. After the first rise, heavily oil your baking pan. Turn out the dough onto a lightly oiled surface and divide into 12 pieces using a scale - they should be about 90g each. Shape each into a ball by using the counter to create tension - by slapping the edge of the dough down onto the counter and folding the dough over to form a ball (there is a video of this on my instagram page if you need a visual), then place into the pan. It doesn't need to be perfect! Leave to rise and then dimple and bake as written in the recipe. I finished mine with the garlic butter from my garlic knots recipe.
For mushroom, tomato and ricotta focaccia (thin base): I made the dough across two 9x13" pans so it was half the height it usually was. It took some time to spread into the pan - gently spread it, then leave it for 10-15 min then try again once it has relaxed. I then rose it as directed, which took less time. I then dimpled the dough and topped with tomato passata, a little shredded mozzarella, sliced portobello mushrooms, more mozzarella, then dolloped ricotta over the top of the cheese. I then baked as directed, and scattered fresh basil over before serving. Make sure to watch your baking time, mine took just over 20 minutes.
Focaccia freezes very well - I left the toppings off the top just so that the salt didn't make the bread go soggy, as salt draws out moisture. I just finished it with olive oil. I froze the baked focaccia in a ziploc bag. You can bring to room temperature and then refresh in a 350°f / 180°c oven to warm it through before serving.
Comments
Anita Titter says
This is my absolute go to focaccia recipe. It’s super simple and also really forgiving. It’s never not been perfect. Thanks Erin.
Emma says
Don't think I will ever buy supermarket focaccia again! This recipe is so reliably good and really easy. Highly recommend.
Sarah says
Made this for the first time recently and oh my goodness it is the best. Delicious flavour and so simple to make. Thank you for the recipe!!
Kristina says
When I go to dimple the dough after it’s risen, the dough flattens very quickly and loses about half its height. Is that normal and okay? I can’t see any way of avoiding it.
Incredible recipe though, my new go to for focaccia !!
Erin Clarkson says
Hi! Yep it sounds like it's over proofed, try doing the second rise for less time 🙂
Antonia Locarnini says
This is the best and easiest foccacia recipe! Everyone I've made it for absolutely raves about it!
Erin Cranor says
Truly the easiest and most fail-proof focaccia recipe out there. Turns out perfect every time, love that she has instructions for different rising/ chill schedules, ideas for alternate toppings, and just pretty much thinks of everything.
Anna says
Great bread!! So convenient to make the dough ahead of time and love how bubbly and jiggly it is - my old recipe was way too dense so this is my new go to!
Brooke says
Love this recipe, it's so easy I make it all the time!!!!
Nina says
Best focaccia ever, made it more than 10 times, and it is delicious every time!
Jessics says
Have made this multiple times now and love it. So easy and delicious! Thank you!
Ally says
This is the best focaccia recipe out there– seriously!! I have tried every method Erin suggests in this post and have been successful every time. My family thinks I’m a focaccia wizard because of this recipe.
Jillian Tizzard says
By far my favorite focaccia recipe! It turned out just as the description said, soft, chewy and utterly moorish 🤤 a new family favorite recipe!
Samantha l says
This recipe got me into bread making and everyone raves about this foccacia when I make it, but it is all down to Erin's amazing recipe. ANYONE who whinges about the content between top of page and recipe is a rookie because the fabulous and informative tips and tricks Erin has in this space has levelled up my knowledge and made my baking in general better. I am a fan girl, I am not ashamed.
Emily says
I've never made focaccia before and it turned out great. Every time I want to bake something I always check Erin's recipes first!
Jennifer Owen says
I love this recipe. It's so easy and turns out delicious. I really like the flexibility of it being able to make the dough the night before or the same day. My husband likes the rosemary and garlic topping the best.
Debra Amorelli says
Can you please translate grams to cups/ounces/teaspoons/tablespoons.
Some of the recipe has teaspoons and some are in grams.
Erin Clarkson says
Hi, Debra, you are welcome to translate this yourself if my free recipe format does not suit you
Debra Amorelli says
I tried doing that yesterday to disastrous results. But thanks for the reply.
Anne Golden Latini says
One of those things that has a great low lift to high reward ratio. Endlessly customizable. Makes a great loaf for giant party sandwich!
Erin Clarkson says
Thank you so much for all the lovely reviews! I am so happy you loved! xx
Kharina says
Hands down the easiest and most rewarding focaccia recipe I've ever baked! I brought it with me to a party last night (it had been out of the oven 40 minute prior and was still warm. There were 11 there and there were hardly any left when we went home - a huge success, they all loved it! I made it with the onion and crispy potatoes, which really made it absolutely delicious with the sweetness of caramelised onions and crispy mildly garlic potatoes.
I directed them to your blog and Instagram, so expect a tiny surge of interest from the UK! Thanks again for such an incredible recipe!
Francesca says
Hi! I’ve made this recipe countless times and it is always perfect! Thank you for sharing! I do have a question: if I need the Focaccia in the morning say by 10 AM, considering it has to sit a room temperature for 4ish hrs, that would mean getting up at 5am to pull it out of the fridge, could I put it in the pan in the evening, put it in the fridge overnight, pull it out and let it rise at room temp for about two hours before baking?
So like this: make the dough at 8pm Monday,stretches and folds and all that, fridge by 10pm, stays in fridge till Wednesday night, I pull it out, put in pan, back in fridge, pull out of fridge at 7.30am, let it sit at room temp for 2 hours, bake by 10am, is it doable?
Erin Clarkson says
Hi! yep you can - i've written a bunch of sample schedules in the blog post!
Francesca says
Thank you!! 🙏🏼
Lily says
The bread came out perfectly and deliciously! I love all the notes and tips that Erin leaves throughout the post; they definitely helped me along. The bread was just soo good! Thanks Erin for sharing this amazing recipe!
Clare Lord says
This is a super easy recipe with perfect results. Absolutely minimal effort for a gorgeous loaf 🥰
Erin Clarkson says
Perfect focaccia! So happy you loved!
Rachel says
This recipe is spectacular! After making it a few times, all with excellent results, I want a little rogue and swapped in some sweet ingredients - hoping for an apple fritter kind of vibe. (Apple cider for water and added an apple cinnamon topping at the ‘dimpling stage’). Erin has made such a perfect recipe, it stands up to customization with ease. Absolutely perfect savory or sweet!!
Jessie says
Hi Erin! I clicked the link to learn how to add sourdough starter to the recipe and it brought me back to the same recipe. Excited to make the goat cheese/brown butter/sage/butternut squash version!
Erin Clarkson says
Hi, ah yes all the info is in this recipe now, i'll fix that link thank you!
Meg says
Wow! Easy to follow step by step directions to make an incredible soft fluffy, super flavorful bread. Will definitely be saving this recipe! Fun to make and extremely delicious!
Meagan says
My family LOVED the caramelized onion and potato version! Gobbled it up and are now asking for more!
Kelly says
1000/10 🌟🌟🌟 CHEF’S KISS
Catie says
This turned out so well, even after some last minute adjustments to rise times due to poor planning on my part 😅 I made the rosemary garlic variation for Thanksgiving and everyone loved it and asked for the recipe!
D says
Erins recipes are always my go to! After making it as per the recipe many many times, I got a bit too creative and tried to do a cheesymite topping. It didn’t go as I had planned but because the original recipe is so foolproof it was still decent (and for those wondering, no vegemite does not mix into oil no matter how hard you try…) Anyway, great recipe!
Erin Clarkson says
Hahahahah oh jeez yeah maybe like a vegemite cheese mixture would work best spread over?
Lisa says
So, so amazing. Crisp crust yet beautiful fluffy. I used an infused rosemary garlic olive oil, all AP flour and a glass pan. Next time I'll add parchment to the pan bc it did stick (which was mentioned it could happen with glass pans) but the flavor was AMAZING. I can't wait to try some of the variations shared in the recipe!
Sandra says
This was so fun and easy to make! I couldn’t believe I made focaccia that easily. The dough is wet but weighing out the ingredients is easy and it comes together so well. I did the original method with garlic and rosemary and it was perfect with soup on a cold day.
Rosie says
The ‘breast bed ever’ according to my sister who was too excited about eating the best bread ever to speak properly
Erin Clarkson says
Hahahhahahah this is amazing
Heleen says
The absolute best. Foolproof recipe, I enjoy making it as much as eating it.
Kelsey says
The easiest most delish bread! I use mine for sandwiches and it's always a winner.
Ebs says
Made this focaccia recipe, but didn't have the 12 hours to prove in the fridge time. It came out bloody fantastic anyway, super simple!! Will definitely make it again! Love the metric measurements also 😁
Cushla says
Soooooo good!!!! This is my go to. I’ve made it 3 times this since Christmas! .
Kylie says
I have made this recipe many times with many different toppings. I think garlic, rosemary and cherry tomatoes is our favourite. Super easy, fuss free recipe.
Kylee says
12/10 - so easy, especially with an overnight fridge rise. Great flavour and the cheeseburger variant is so so good!
Alicia says
I have made your focaccia multiple times now, and it is always perfect. For Christmas I made a double batch proofing it with the room temp first rise, and fridge second rise method (previously I had always done the fridge first rise, room temp second method) and again, it was perfect! I am so thankful for the time and effort you put into the background, the descriptions and the alternative methods - it makes your recipes so easy to follow and nail! Thanks again.
Sarah says
Amazing recipe, I've never had better focaccia than this, including from bakeries. Really easy to follow, thorough and reliable! I've made this three times now and it's been brilliant every time. Thank you!
Sarah says
Highly recommend - have made dozens of times, and now have requests to bring focaccia to friends events 👏🏻
Leigh says
This worked perfectly and was amazing. Made a little confit garlic for the topping and used the garlicky oil and it was delicious. The really wet dough did make me nervous but stuck to the instructions and it was great.
Kaitlin says
Best focaccia recipe around. I've made it many times and it's always turned out flawless. Even recommended the recipe to my mom who rocked it and was so proud of her creation!
Cate says
This recipe is the absolute bomb. Literally haven’t used any other focaccia recipe since I found it as I’ve only ever had fabulous bakes (and I bake a lot of bread). Today’s version was halloumi, chilli, garlic and rosemary with warm honey drizzled over it. So grateful to you Erin for the recipe!
Lauren says
My go to recipe for bringing bread to a bbq or get together, it is loved every time. So easy and tastes fantastic! Thank you so much
Megan says
Superb! Easy recipe, really flexible with timing and minimal hands on time!
Claire says
I’ve always felt too intimidated to try baking bread, but all the tips & tricks with this recipe made it so easy, and the focaccia turned out delicious. Thank you, Erin!
Sarah says
I will never buy foccacia again!! This recipe is incredible and I had to make it 3 times in one week for family after bringing it to Christmas Day lunch. This foccacia is now on regular rotation at my place. Erin, you are amazing and I adore reading all of your notes and information before the recipe as it helps me get it right EVERY time. Plus it shows the care and time you put into every recipe you develop.
Blair says
Excellent recipe, great descriptions for the method and theory. Done this 3 or 4 times in the last few weeks. My sons will eat it for dinner, breakfast and take with fillings for lunch.
Just did another for a meal with wider family and it drew a lot of praise, followed by discussion with my chef nephew, who I have sent the link. I have only done it within the same day so far, but will try to plan the long development version when I think to plan for it.
Thank you for sharing, I’m very pleased to find such a good recipe.
Jen says
This turned out amazing. I over proofed it a bit but it didn't negatively affect the result! My entire family loved it.
Abbie p says
I've probably made this foccacia 50x or more by now, it is so easy, love the various options for rise (I usually do overnight first rise) and super yummy! I always get so many compliments when I bake this and I always tell everyone this is the recipe they need to use. One on my absolute favs and written in my recipe book so I never lose it:)
Monica says
Okay, this came out insanely good! My sister is obsessed with focaccia, and she took all of this home with her. I can't eat garlic (boo), so I topped with olive oil, salt, and rosemary. I'll definitely make this again (because my sister will insist on it). Thank you!
Fiona says
By far the simplest and tastiest foccacia recipe I’ve tried. Will be on steady rotation at home . I like how all the different scenarios with topping / proofing have been worked out and described. Absolutely idiot proof !