
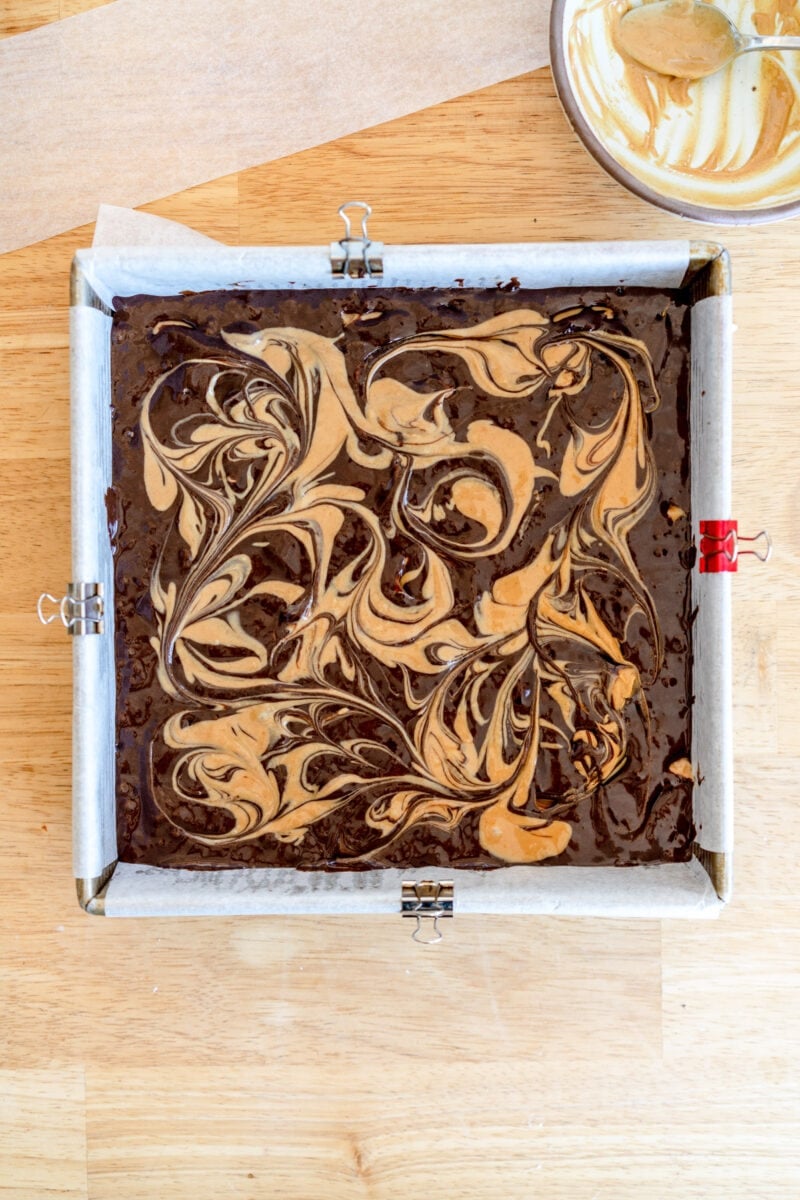
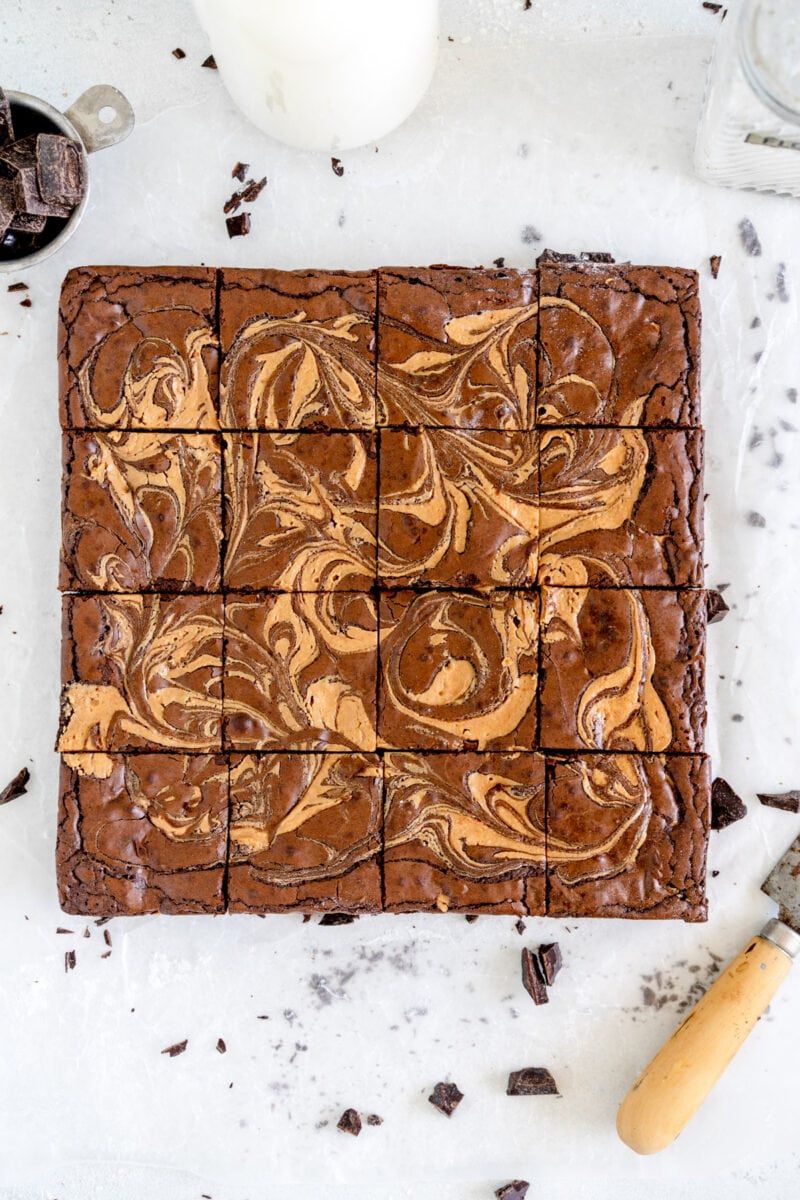
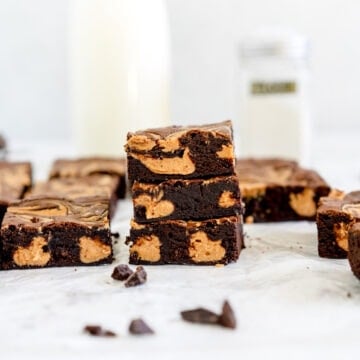
Take your homemade brownie game to a whole new level with these rich, chocolatey, double peanut butter brownies. Chunks of peanut butter are added to the brownie batter before baking, and then the brownie batter is finished with a peanut butter swirl on top for a marbled effect. Each bite into a brownie square is chocolate-peanut butter heaven!

Hi hi! Just popping in to share this recipe for Peanut Butter Brownies! I am still working on a huge homemade brownie recipe collection, and keep finding fun things to add to it!
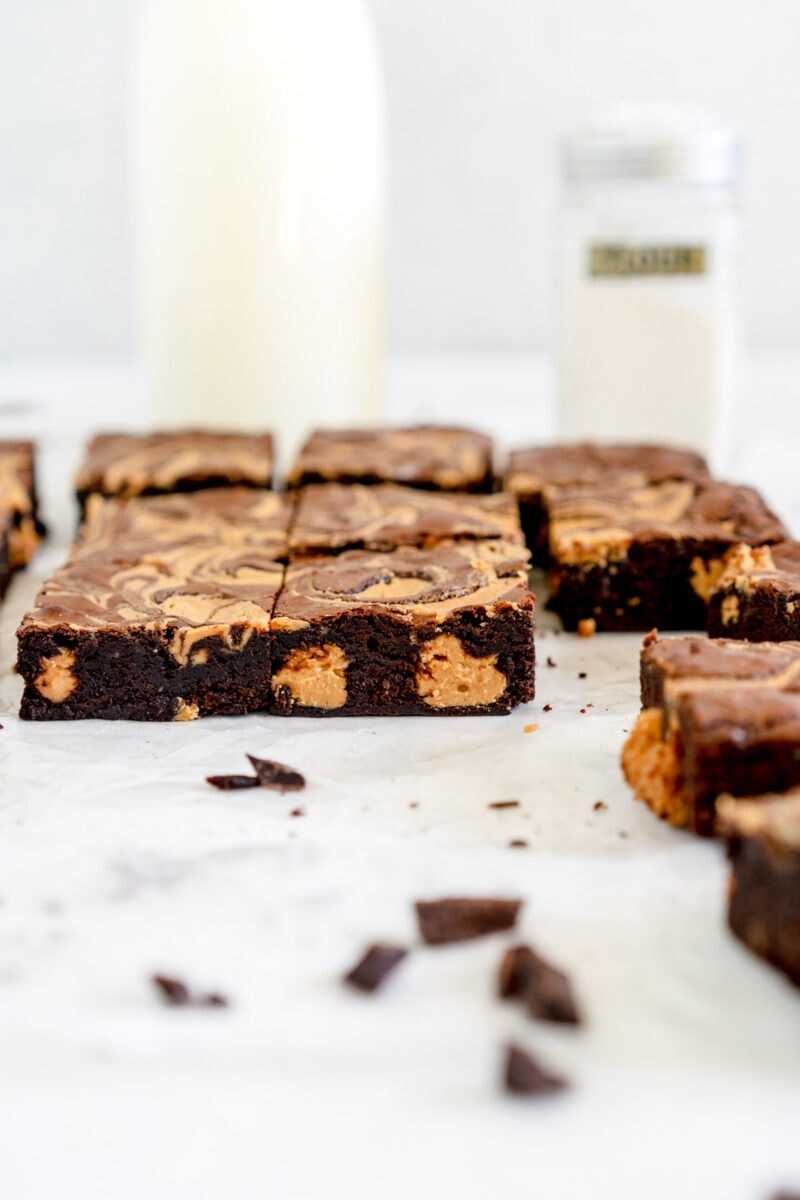
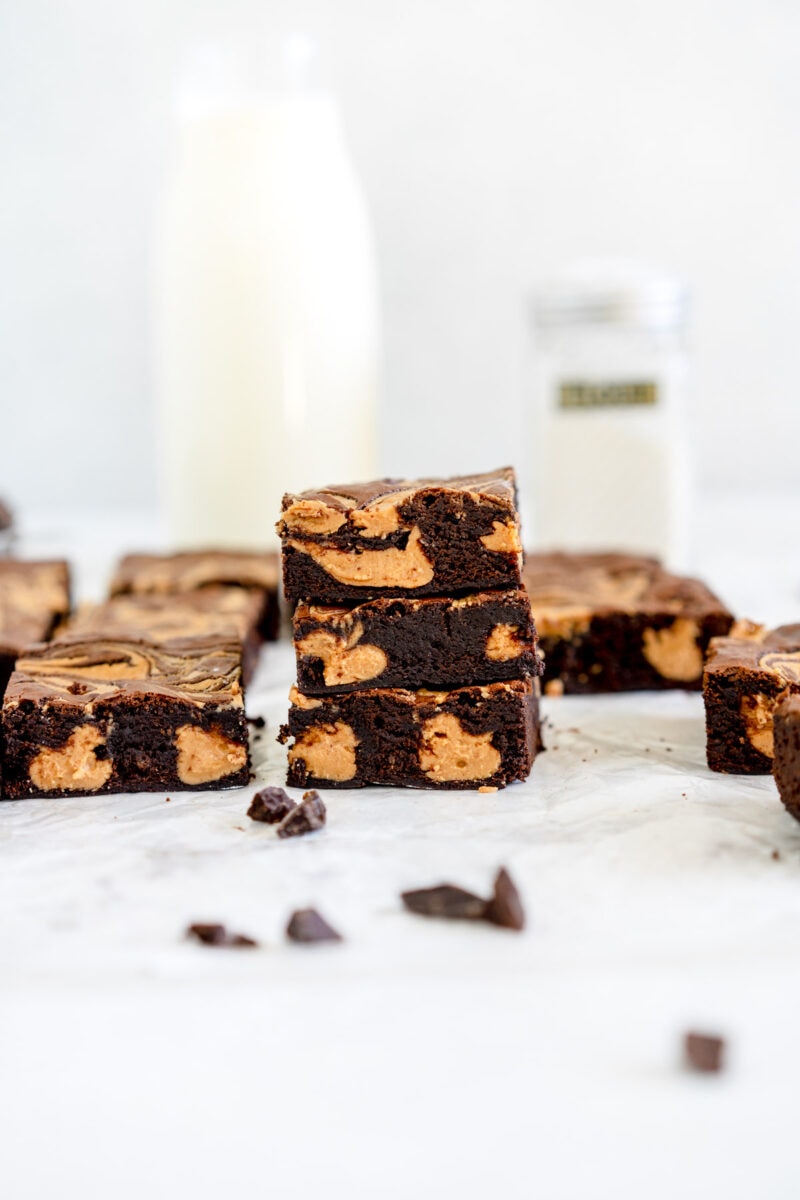
This peanut butter brownies recipe is another twist on my classic fudgy brownie recipe - this time I added a whole bunch of peanut butter. The result is a super rich chocolate brownie, filled with chunks of peanut butter, and finished with a peanut butter swirl.
I love adding peanut butter to recipes - especially in the case of these brownies, it adds a super nice twist while being a really really easy variation.
How to make Peanut Butter Brownies
These peanut butter brownies are a great make ahead dessert - they need some time to cool down before serving to allow the peanut butter to set, however I don't blame you if you just grab a spoon and go for it. They are particularly good with ice cream. This recipe makes about 16 brownie squares, which are great for freezing for later, but will also keep for a week in the fridge.
The baking part however is super easy:
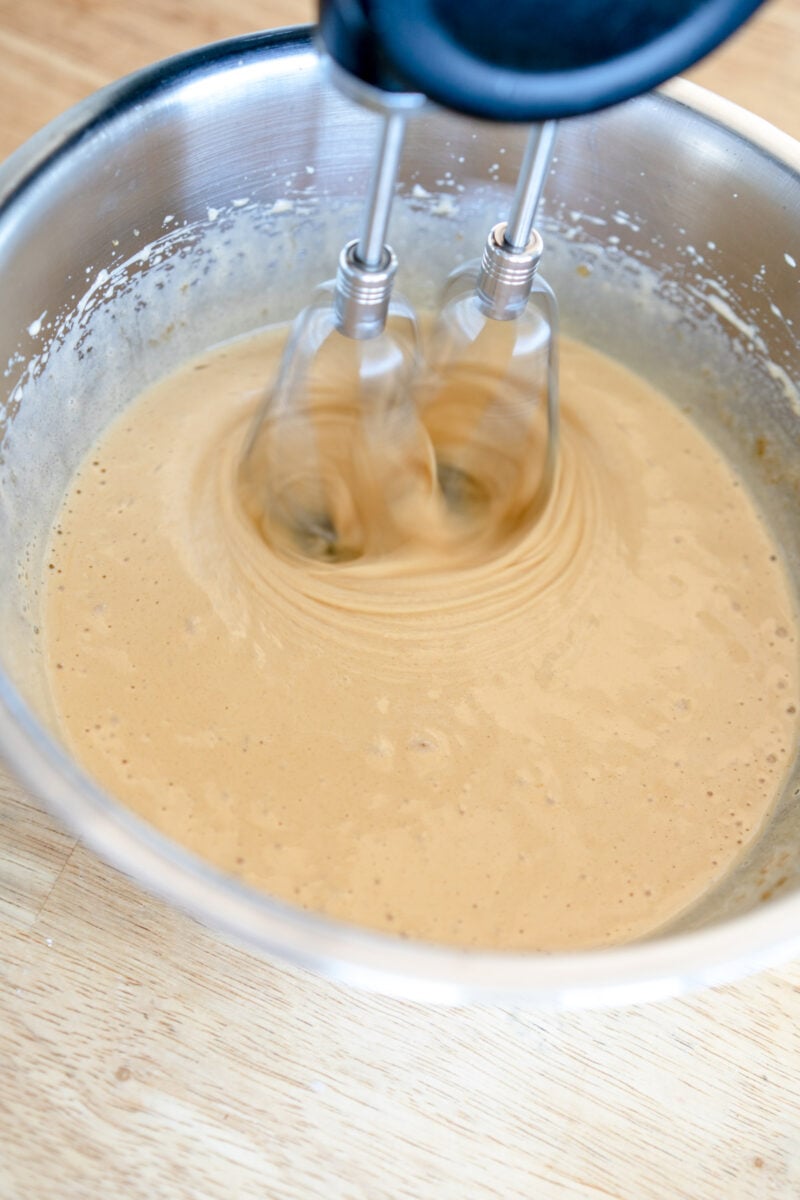
- Make the brownie mixture. This is a scaled down version of my classic brownie recipe, with peanut butter chunks added.
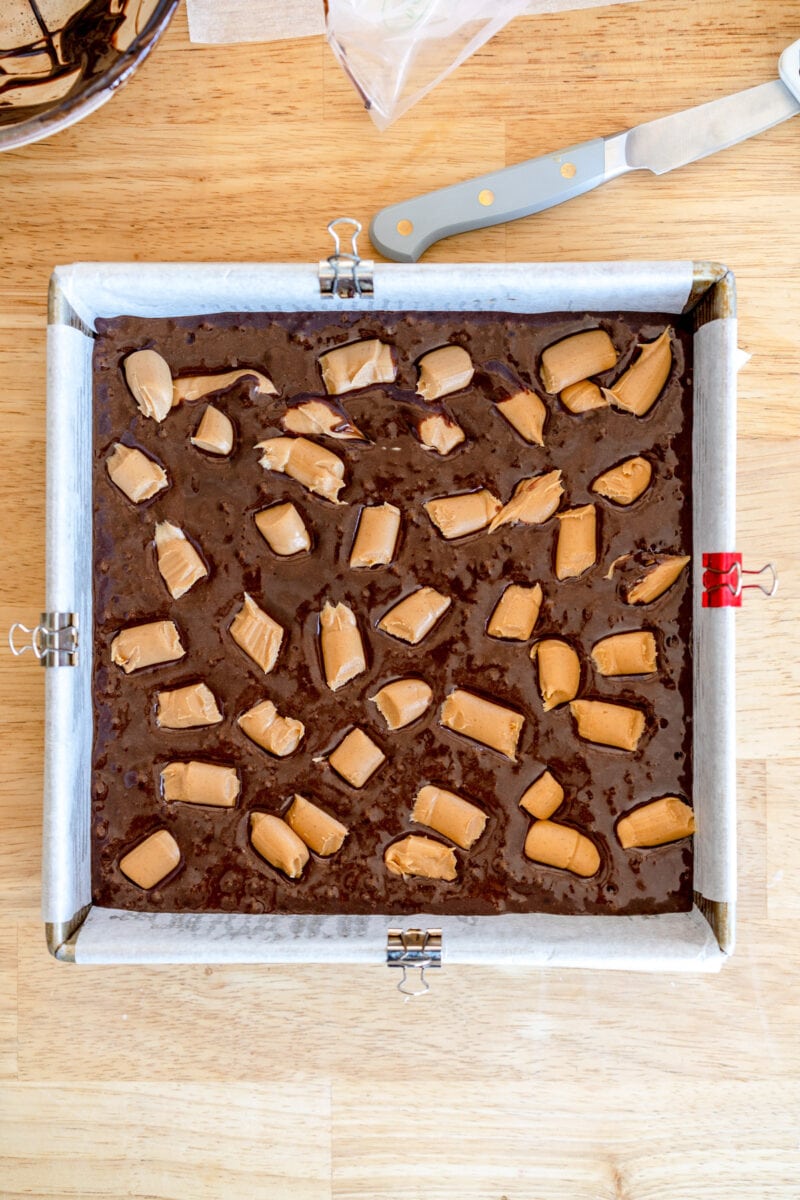
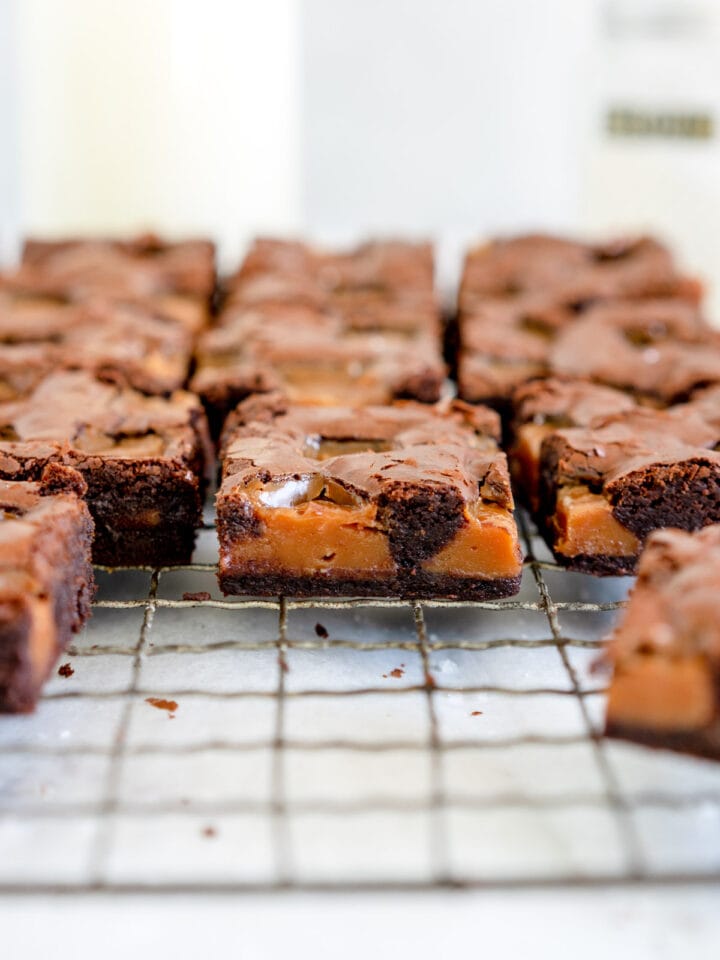
- Add the peanut butter. The peanut butter is added in two additions in this recipe - peanut butter chunks added to the brownie go in first, on top of the brownie batter in the pan. They will sink down slightly as they bake.
- Cover over the peanut butter chunks. Use an offset spatula or something similar to cover over the pieces of peanut butter. This gives you a fairly smooth surface to do your peanut butter swirl.
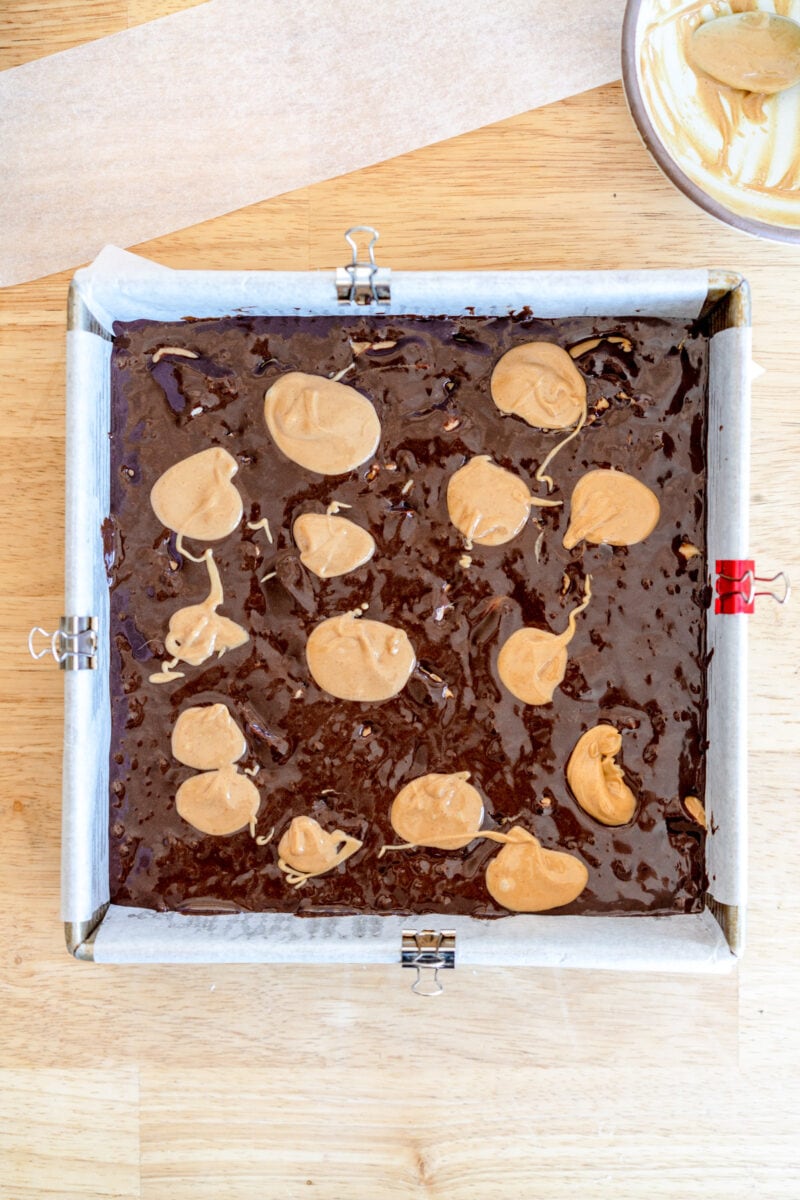
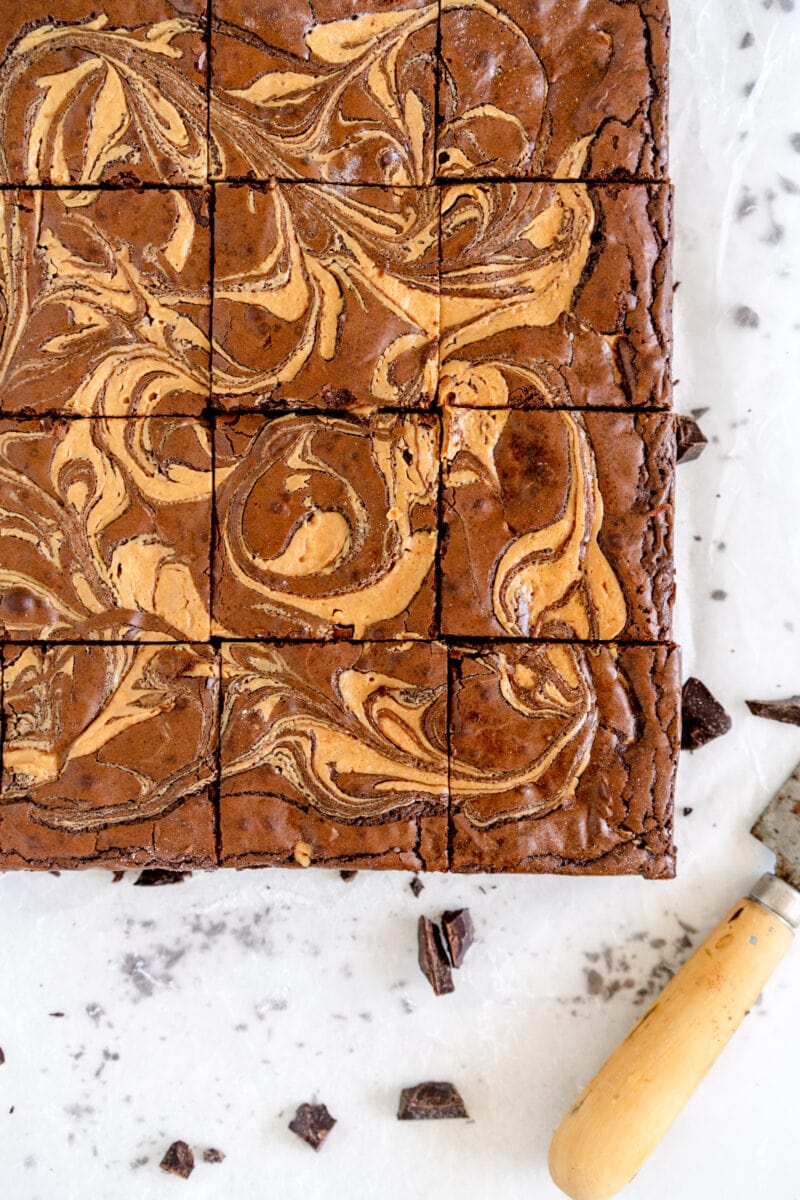
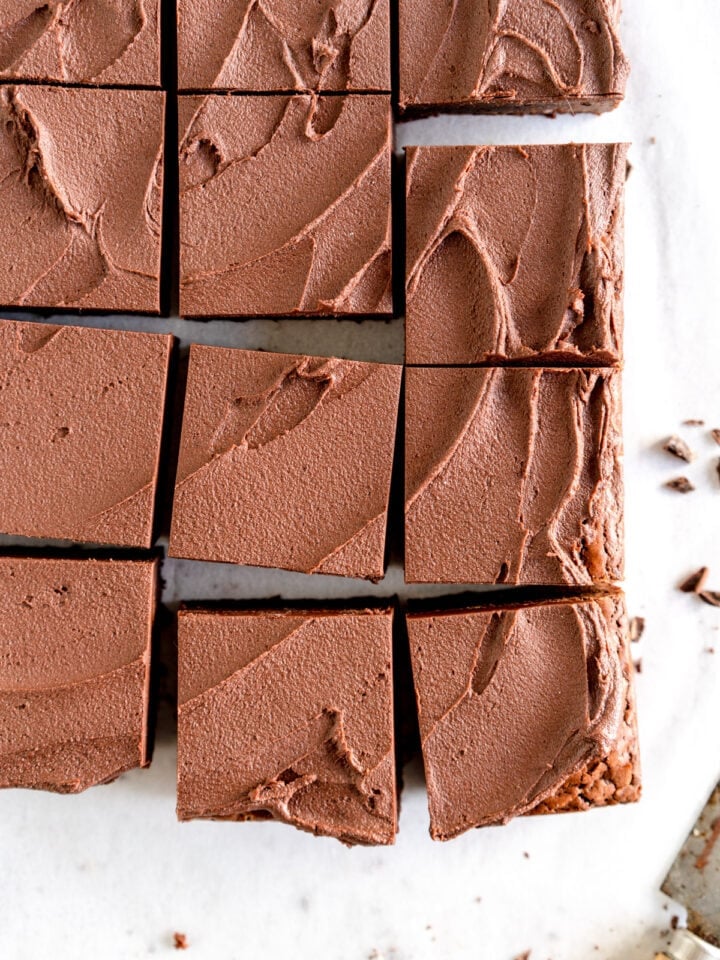
- Add the peanut butter swirl. The easiest way to do this is to dollop warmed peanut butter over the surface of the brownie, then swirl with a knife or a toothpick.
- Bake. Bake the brownie until the edges are set and the inside is no longer gooey.
- Cool. Leave the brownie to cool completely before removing from the pan and slicing. I like to chill it down too before I do this so that it cuts neatly.

How to add Peanut Butter to Brownies
I tried a few different ways to add peanut butter to this brownie recipe when I was testing - the first was to just add a swirl of peanut butter on the top. However I wanted a super intense peanut butter flavor rather than just a swirl.
The next test was to try freezing blobs of peanut butter and incorporating them into the dough. This turned out to be way more effort than was needed.
I then tried heating the peanut butter slightly and placing it into a piping bag and injecting blobs of it into the brownie batter. This worked ok, but was still too much effort and if the peanut butter was too runny, then it went everywhere and made a massive mess.
Finally, I worked out the best way - use room temperature peanut butter, and pipe it in or dollop it on with a spoon. I actually ended up putting it in a piping bag and using kitchen scissors to cut off chunks. It worked great!
For the peanut butter swirl, I just warmed up a little bit of peanut butter in the microwave and then dolloped it on top of the batter before swirling. If you don't have a microwave you could place it into a heatproof bowl and warm it over a pan of simmering water until it is runny.
What kind of peanut butter is best for peanut butter brownies?
I prefer a creamy peanut butter for peanut butter brownies, but you can really use whatever you like here - if you want to use a crunchy variety then go ahead!
I used a non-natural variety of peanut butter - so one that does not get oil separation within the jar, as I find that this version is easiest to deal with. I have not tried making it with natural peanut butter, but you are welcome to try.
Here are all my top tips on how to cut brownies cleanly:
- Wait until they are cool. Even better, give them a wee spin in the fridge before you cut them.
- Use a nice, sharp chef's knife. This is important. If you want, you can run it under hot water and dry it before you cut it, so you have a hot, dry knife
- Wipe the blade between cuts. This is important for things like brownies which are fudgy. A clean blade will give you the best chance at a super clean cut on a brownie.
- If it all gets wonky and messy, don't worry. They will still taste good. I've been all set to shoot a recipe and cut my brownies wonky and had a meltdown - i've been there I promise. We still ate them.
How to tell when brownies are done
The best way to tell when brownies are done is to check if they are set. Baked brownies will be set around the edges, and if you insert a knife or skewer into the centre (not into a piece of peanut butter), it should come out with a few moist crumbs attached.
With that being said, you are best to under bake your brownies rather than over bake them if you can. I like to chill mine down before cutting into them which makes them even fudgier.
For all my best tips and tricks on how to get a perfect crinkly top on brownies, check out my post: Fudgy Homemade Brownies
Can Brownies be made ahead of time?
Yes, this peanut butter brownie recipe is the perfect make ahead dessert. In fact, I prefer to make my brownies ahead of time in order to give them time to properly cool before slicing them.
If you want extra fudgy brownies, once cool, lightly cover the baking pan in plastic wrap and chill for a few hours or up to overnight. Cold brownies are my favourite.
Frequently Asked Questions
What tools and equipment do you use?
You can find a full list of the tools and equipment I use on my products page
How do you store Peanut Butter Brownies?
Store peanut butter brownies in an airtight container at room temperature or in the fridge. They will keep a few days at room temperature and up to a week in the fridge.
Can you freeze Peanut Butter Brownies?
Yes, brownie recipes freeze well. Place them into an airtight container in the freezer. They will freeze for up to 3 months. Defrost in the fridge or at room temperature before eating.
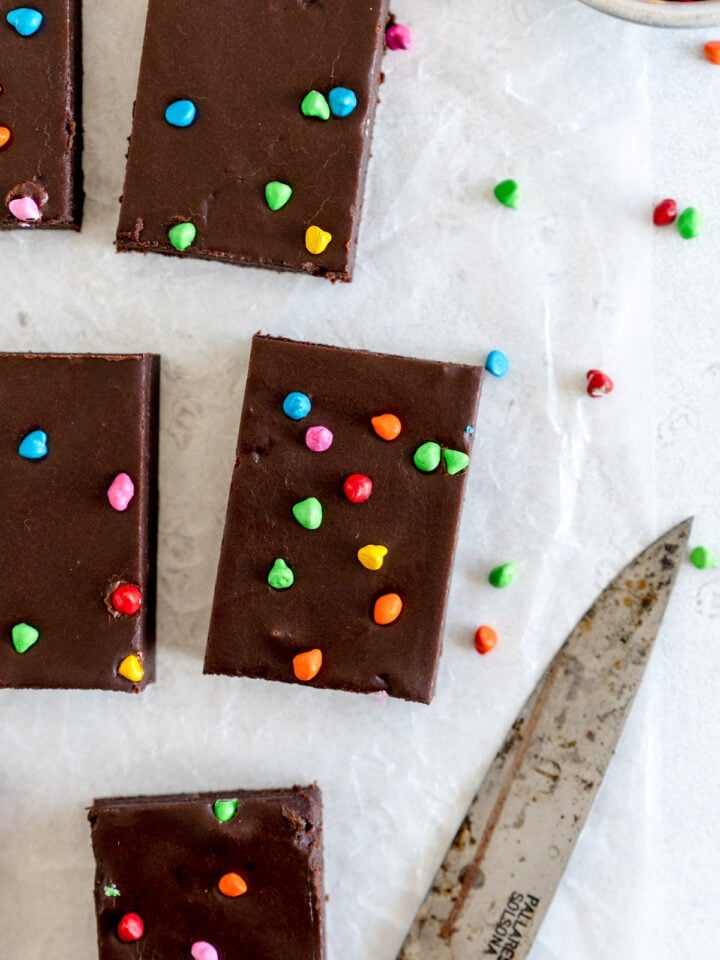
Can I add chocolate chips?
You can do whatever you like here. Add some nuts or some chocolate chips - whatever takes your fancy.
Can I make these into Biscoff brownies?
Yes - this works perfectly! I just subbed the peanut butter for biscoff spread. I also used black cocoa to offset the sweetness of the biscoff but the regular Dutch process will work great too.
Can I make this recipe in a round pan?
Yes - I made them in a 10" round pan and they were great.
For more Brownie Recipes, check out:
❤️ Made this recipe and love it? ❤️
I would LOVE for you to leave me a review and star rating below to let me know how you liked it! Also, please make sure to tag me on Instagram!
Answers to your baking questions
Over the years, many of you have asked me questions about:
- baking in grams
- adjusting oven temperatures
- what kind of salt to use
- and many more!
I've curated and answered them all for your easy reference in this frequently asked questions post!
Peanut Butter Brownies
- Prep Time: 15 minutes
- Cook Time: 25 minutes
- Total Time: 1 hour
- Yield: 16 servings 1x
- Category: Brownies
- Method: baking
- Cuisine: American
Description
Take your homemade brownie game to a whole new level with these rich, chocolatey, double peanut butter brownies. Chunks of peanut butter are added to the brownie batter before baking, and then the brownie batter is finished with a peanut butter swirl on top for a marbled effect. Each bite into a brownie square is chocolate-peanut butter heaven!
Ingredients
Brownie Layer
- 135g dark chocolate (I used 72%), coarsely chopped
- 120g unsalted butter, cold from the fridge is fine
- 10g dutch process cocoa or regular unsweetened cocoa, sifted
- 2 large eggs (about 100g not including shells)
- 135g caster sugar (granulated sugar works fine but will not give the super glossy brownie top, see notes)
- 65g light or dark brown sugar
- ¼ tsp salt
- ¼ tsp vanilla extract or vanilla bean paste
- 65g all-purpose flour, sifted
Peanut Butter
- 200g creamy peanut butter, for adding in as chunks
- 50g creamy peanut butter, slightly warmed, for swirling on the top
Instructions
- Preheat the oven to 350°f / 180°c. Grease and line a 9” (23cm) square pan with parchment paper, making sure the parchment extends over the sides of the pan to form a ‘sling’. Clip down with binder clips if desired.
- In a heatproof bowl over a pan of simmering water (make sure the bowl does not touch the water), combine the dark chocolate and butter. Heat, stirring frequently, until the chocolate and butter are melted and the mixture is smooth. Alternatively you can do this step in the microwave - microwave for 30 second increments, stirring well after each until the mixture is smooth and combined.
- Sift the cocoa powder over top of the chocolate and butter mixture and stir until well combined.
- In a large bowl, combine the eggs, granulated sugar, and brown sugar. Mix on medium to high speed with an electric handheld mixer for 2-3 minutes until the mixture has lightened and increased in volume. This step can also be done in a stand mixer using the whisk attachment.
- Add the chocolate mixture and mix to combine. Add the salt and vanilla and mix until incorporated.
- Add the flour and incorporate by hand until the mixture is smooth and does not have any lumps.
- Transfer the batter to the prepared pan, and tap the pan on the counter a few times to ensure there are no air bubbles. Leave to sit for a minute or two then bang again to ensure there are no bubbles.
- Place the 200g measure of peanut butter into a piping bag and snip the end off (alternatively you can dollop it in with two teaspoons). Squeeze the piping bag until a sausage of peanut butter comes out, and snip off in about 2cm increments (see images in the blog post), arranging them evenly over the top of the brownie batter.
- Using an offset spatula or a spoon, carefully cover the peanut butter chunks with the brownie batter, making sure not to press them down too much.
- Warm the 50g measure of peanut butter slightly either in 10 second increments in the microwave or in a heatproof bowl over simmering water. Spoon blobs of the peanut butter over the surface of the brownie - it is ok if they are not perfect. Using a toothpick, the end of a knife or a cake tester, drag it through the peanut butter to give a swirled pattern.
- Bake the brownies for 22 to 28 minutes, checking after 20 minutes. You are looking for the edges and top of the brownie to be set, and when a skewer is inserted in the middle, it should come out with a few moist crumbs attached. You are best to lean toward under baking than over baking.
- Remove the brownies from the oven and place the pan on a wire rack. Leave to cool in the pan then remove using the parchment paper sling. Slice using a sharp knife.
- Store leftovers in an airtight container at room temperature for up to four days or in the fridge for up to a week.
Notes
- Can I use salted butter?
Yes - if you don't have unsalted butter that is totally fine - just hold back a little on the salt content in the brownie batter. - Do I have to use caster sugar?
No - you can use regular granulated sugar if you like. In New Zealand, our sugar is much coarser, so I call for caster sugar in the recipe. However if you are in the US or you have finer sugar, regular granulated is fine. Either work great in the recipe, caster just dissolves better when being whipped with the eggs to form that crackly top. Another reason why baking with grams is the best - 200g of sugar is 200g sugar. - Can I use biscoff spread?
Yes - just sub the peanut butter for biscoff spread. Everything else stays the same.
Comments
Andrea says
Yum! Just made these as is, the whole family loved them. Perfect crinkle top.
stacy says
these are the best!!
caribou says
my new favorite brownie!
Shana says
Saw this on your Instagram this morning and immediately thought I had to make them today. Not sure what I did wrong - but my batter was super thick and there just wasn’t enough (the brownie layer is really thin - it seems to be about a third of your plain brownie recipe?) so it was really difficult to cover the chunks of peanut butter. So it ended up being more of a peanut butter swirl throughout. I weighed everything and used granulated sugar. Any thoughts where I went wrong? I’m sure they will taste delicious but I wanted the chunks!
Erin Clarkson says
Hi! Hmmmm any chance you used the wrong sized pan? The quantities are definitely correct (it's 2/3 of my regular recipe) and you sort of just use a little bit of the mix to lightly cover the bits of PB! So sorry it didn't work out! the batter shouldn't be thick though unless the butter mix cooled too much and got thick?
Shana says
They are delicious even though the peanut butter isn’t in chunks. I was wrong about the 1/3 - I realized I had your original fudge brownie recipe doubled in my recipe app. I wonder if because my eggs came straight from the fridge, they cooled the chocolate mixture down too much (along with it sitting on the counter for probably 10 minutes after I took it out of the microwave). Anyway, they are delicious and we all love them! Your recipes are the best!
Linda garcia says
I don't know metric measurements ,so I couldn't figure it out evenin though it sounds delicious
Roberta says
I made a version without PB because I didn’t have enough but maaaan these are good. Erin is always “result guarantee” to me!😃
Jess Powlesland says
Honestly Erin, you have created a monster with these! I made them for my step dad initially, gave my partner some to try as he was begging and ended up in a deal to make him a tray as well! Step dad also LOVED them. They both want a weekly batch from here on out.
The recipe is really easy to follow, definitely worth getting the non-natural peanut butter for as it has the perfect texture for it and creates the “chunks”.
Lance says
Can I use black cocoa instead?
Erin Clarkson says
Yep!
Amy Gerber says
how do these freeze?
Erin Clarkson says
Super well!
julie says
Very delicious brownies!! I made the brownie recipe exactly but instead of piping the peanut butter I chopped up a block of fridge-cold Whittakers Peanut Butter chocolate and folded most of it into the batter, and dotted some over the top. So so good!
Eleonore says
The batter is absolutely delicious, unfortunately mine was under-cooked even after 26 min of cooking 🙁 The brownies were nicely cracked at the top but was completely raw inside! Maybe because I didn't use a square pan, but a rectangle one. Thickness of the batter was too much. I'll know for next time!
Ellen says
Just made these and we couldn’t get enough. The recipe is so easy. I didn’t have a plastic bag around and used two spoons instead. Worked a charm!
They are so delicious slightly warm, from the fridge, and reheated.
Mia W says
Hi. Can I use An 8x8 pan instead or no? Also is there video some where of how this is made?
Erin Clarkson says
It will be super thick if you use a smaller pan. There's a few on IG!
Jenn C says
These brownies are literally to die for. I will make them again and again. My husband stood there eating them and kept on saying OMG, they are that good. They are also easy to make. As always, your recipes are amazing.
Toni says
This is the most AMAZING recipe. It's 100% my go to brownie recipe. I made it for a community bake off and won first place!
Sian says
Do you think I could substitute gluten free flour instead of the all purpose flour?
Erin Clarkson says
I haven't tried it sorry but it should be ok for a brownie!
Kathie Anderson says
Why is the SIZE of the PAN the SAME for 1X, 2X or 3X the recipe amount? Are we supposed to divide the batter into additional pans if we double or triple the recipe amount?
Erin Clarkson says
Hi! Yes you will need to use multiple pans. The 1x 2x etc just multiplies the ingredients in the list, if it doubled the other numbers it would result in strange sized pans, and impossible oven temperatures etc.
Theresa Johnson says
Today is my birthday and I decided to make myself birthday brownies instead of a birthday cake. These brownies are so delicious. They were the perfect way to celebrate and enjoy with my family! Thank you 🙏🏾
Erin Clarkson says
Ahhh you are so welcome! I hope that you had a great birthday!
Lori says
This recipe looks so amazing! I was very excited to make them...until I noticed that there is no conversion to the US measurement system. If you want folks in the US to make these just add the conversions into the ingredient listing.
Erin Clarkson says
Hi, I lived in the US for a long time and the majority of my readers are from there. Lots of people own scales in the US - people are welcome to do the conversions themselves but I am not comfortable providing a less accurate recipe when scales are so easy to get and make such a huge difference to your baking.
Rebecca says
Is it possible to mix the batter ahead of time and then put it in the oven a few hours later?
Erin Clarkson says
I haven't tried it sorry!
Shannon says
I’ve now made these twice in 1 week. Family gobbled them up!
Jessica says
This recipe was a struggle as some of the instructions were not clear. The outcome was a tasty dessert, but it did not yield the fudgey chunky brownie I expected. It was far more cakey and inconsistent in texture, and more of a mess to make than I had anticipated. I used the caster sugar, vegan butter and 42% cacao semi-sweet chocolate chips — wondering if there was some chemical interference due to the differences in fat content?
A few suggestions for edits:
- Line the pan with parchment paper, THEN spray cooking oil to grease paper. Brownie lifts out much cleaner and easier this way.
- when pouring batter in, reserve about a 1/3 in order to cover the peanut butter chunks. I did not because there was no prompt to, and the batter and PB became more muddled than I would have liked.
- way too much peanut butter - I used about 175g total, which still felt like too much.
- I didn’t have a piping bag so I tried the spoon method. It was a total mess. Instead of trying to work with room temp sticky gooey peanut butter, might I suggest spreading the PB in a thick layer (approx 3/4”) on a piece of wax paper on a flat surface and sticking in freezer before mixing the batter. When ready to put in the PB chunks, cut the chilled PB into cubes — so much cleaner and easier and consistent.
Erin Clarkson says
Hi, sorry it didn't work for you - I've made it a bunch and never had any issues. Vegan butter and regular butter are definitely different so that might have been where something went wrong! I've never sprayed parchment paper and made hundreds of things and never had any sticking etc.
S says
What a successful recipe! Honestly, everything I make from this website is ALWAYS a success! Thank you💜
Hazel McGibbon says
These were the best brownies I have made. Have used a few recipes over the years but none had given me that perfect papery top with the best texture inside. This recipe did it. So now it's my go to one. I did them with biscoff inside. So so good!